If you are an avid gardener, there is no doubt that you’ve one time or another grown courgettes, pumpkins or marrows on your vegetable garden. Even so, there is a high likelihood that you’ve not yet tried your luck on gourds. Perhaps, you’ve been deceiving yourself that growing gourds is a reserve for professional farmers. Well, that’s not the case! The truth is, all of these plants belong to the Cucurbitaceae family. Therefore, if you have grown any of them before, it goes without saying that you have the audacity and flair to grow tasty, colorful and eye-catching gourds. And even if you have not tried any of them yet, one thing is for sure – gourds are easy and fun to grow. So, if you are contemplating growing them this year, its time to start planning. If you are still in doubt of your skills, this guide has everything there is to know about growing gourds from sowing, transplanting, caring, harvesting, all the way to storage.
What are gourds?
Gourds are the dried fruits of a wide array of plants mostly within the Cucurbitaceae. They typically come in 3 varieties:
Hardshell (Lagenaria Siceraria)
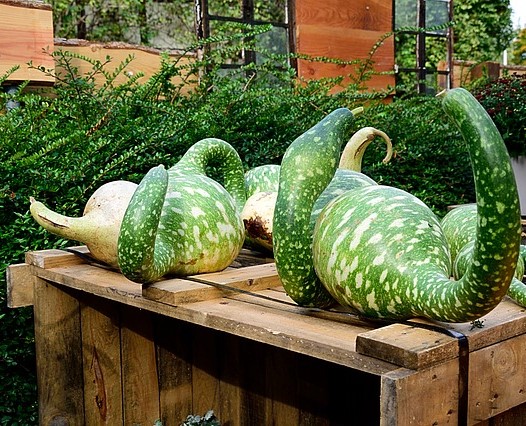
The vines of hard shell gourds produce small white flowers which bloom at night and bear mottled or green fruits in an assortment of sizes and shapes. After harvesting, these can be dried and cured a process that allows them to be stored indefinitely. Cured gourds can be used as musical instruments, in crafts or put into practical uses such as dippers, bowls, birdhouses, bushels or baskets.
Ornamental (Cucurbita Pepo)
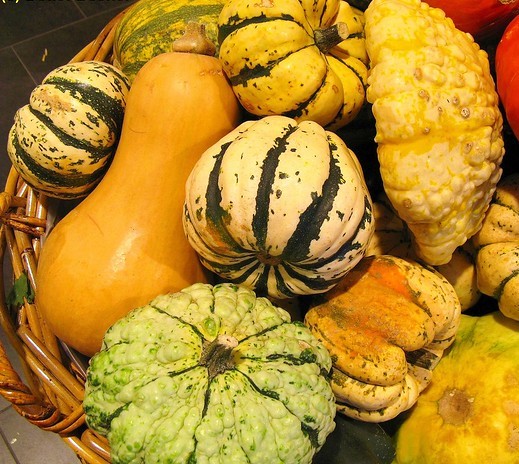
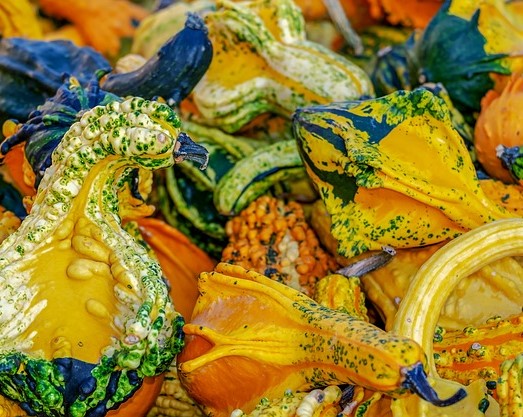 These are more related to squashes and pumpkins and are harvested in autumn. Their vines produce golden yellow blooms just like pumpkins which grow into beautiful and colorful fruits. Moreover, fresh ones can be used as seasonal décor. Unlike their counterparts, ornamental gourds don’t dry well but they can be shellacked or waxed to extend their shelf life once harvested. The difference between the two varieties is that ornamental ones come in a wide array of colors which include gold, yellow, orange, green, and white.
Vegetable sponge gourds (Luffa)
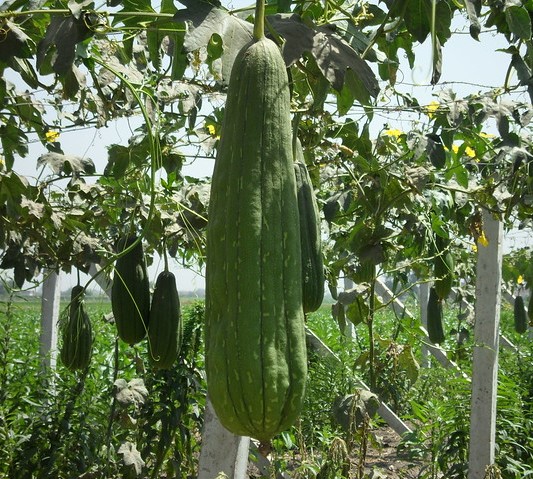
These are normally cultivated for their fruit which is edible when young. Ripened fruits have a sponge-like interior which is used to make household products such as washing and bathing dishes. Their fruits are oblong in shape, green in color and measure about 30cm.
Section 1: Preparing to Plant
Choose a Variety of Gourd
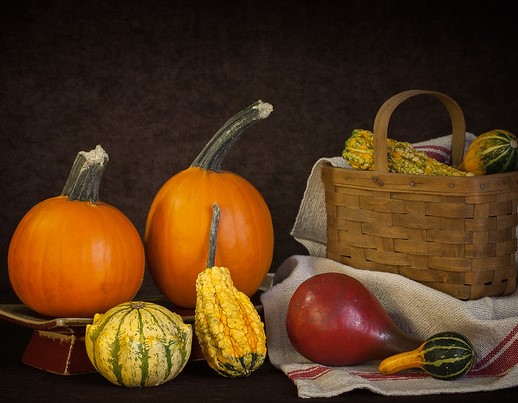 Gourds are available in a wide array of species each with its distinct color, shape, size, and shape. The choice here boils down to your preferences and needs. If you would rather grow gourds for food, the vegetable sponge gourd will come in handy. If it is purely for decorative and ornamental purposes, the other 2 varieties are ideal choices.
Some of the edible species include cushaw, young luffa, butternut squash, Hercules war club, golden acorn, and festival squash among others. Ornamental varieties include Turk’s Turban, Harlequin, Dinosaur, Speckled Swans, Russian Dolls, and Birdhouse.
Determine When to Plant
Typically, gourds will do well under all climatic conditions. However, they thrive in hot areas experiencing between 75 and 85 degrees Fahrenheit. If your area experiences very low temperatures during the entire winter, it is advisable to start your seeds indoors before sowing them on your garden. This involves sowing the seeds in individual pots and providing grow lights, water, and fertilizer. After sowing, they will take approximately 180 days to mature but keep in mind that if you come from a cold region, you will have to start your seeds six to eight weeks before the final frost of the season.
Select a Planting Location
Gourds should be planted outdoors under full sunlight and with lots of space to allow them sprawl. However, you can plant them in pots though this will significantly limit their production and the size of the fruits. If you are considering growing your gourds without support trellis, go for space with a lot of space so that the vines can spread effortlessly. If you decide to use a trellis, stake them over a wide area to ensure that they receive ample sunlight. Plant the seedlings at least eight to ten feet apart to allow free circulation of air and reduce the chances of diseases forming and spreading.
Section 2: Sprouting Gourd Seeds
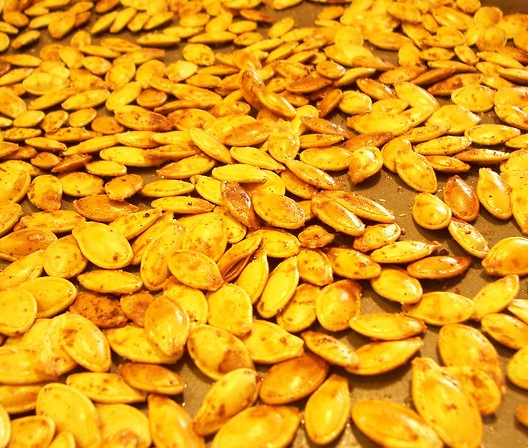
Even though gourds can be sown directly in your garden, it is always good practice to sprout them in a nursery or pots before transplanting them to their final location. By so doing, you will be in a better position to care for the delicate young plants until they are strong enough to go to the garden.
Scarify the Seeds
As any gourd farmer and they will bear me witness that gourd seeds are infamous for their hard and tough outer shell which is responsible for its long sprouting period or at times prevent it from germinating. To protect your seed from rotting, scarify them to thin the outer shell and speed up the germination process. You can use a smooth sandpaper or emery board to scratch both sides of your seeds but be sure not to overdo it since it can damage the seed.
Soak the Seeds
After scarification, soak the seeds in warm water for 24 hours to further soften the outer shell. This will allow water and air to freely get inside the speed which will ultimately speed up the germination process.
Let the Seeds Dry
After 24 hours, retrieve the seeds from the water and place them on a dry wax paper to dry. Ensure that they are completely dry to minimize the risk of them rotting once sowed.
Starting your Seeds
Gourd seeds can either be started in pots or trays depending on what is practical for you. If you are using a pot, ensure that it has holes on the bottom and on the sides to facilitate drainage. Fill your tray or pot with potting soil and place one seed on each slot of the tray or the pot. Using your finger, push it down into the soil until it is about a knuckle deep. It should be at least an inch into the soil to prevent water from exposing it. Water on a daily basis and ensure that the location of your nursery, trays, or pots receives plenty of sunlight to prevent the seedlings from growing too tall after sprouting.
Section 3: How to Care for Gourd Seedlings through Sprouting
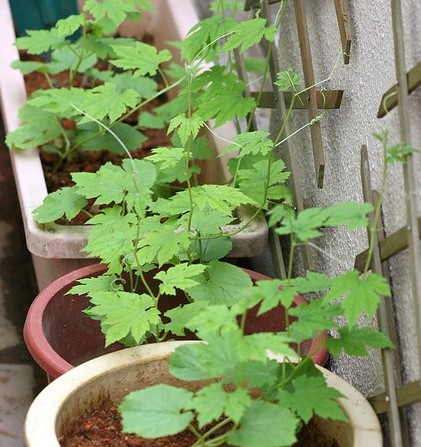
After seeding and watering your pots or trays, look for the warmest part of your home and place them there. During the day when it is sunny and warm, transfer them to a window or outdoors and cover them with plastic sheets. This supply the seeds with vital warmth which is necessary for them sprout. If left in a cold place, the seeds will certainly rot. After the seeds start sprouting, transfer your pots or crates to a window which receives direct sunlight.
Hardening Gourd Seedlings to Survive Outdoors
After 3 or four after germinating, it is time to start hardening your seedlings in preparation for transplanting. This can be done by placing them outdoors during warm and sunny days for at least 2 hours. If the weather is windy and cold, you can harden them by reducing the frequency of watering but ensure that there is enough moisture to prevent the delicate seedlings from wilting. Gradually increase the number of hours you place them outdoors. And if it not sunny and warm, gradually reduce the frequency of watering so that the seedlings will have the strength to endure the weather conditions outside once transplanted.
By the time they are two weeks old, they should only be placed indoors when it is very cold or windy. Let them adjust for a week before you can think of transplanting them to your garden.
Section 4: Preparing your Garden for Transplanting
Once your seedlings have hardened enough to survive the weather conditions outdoors, start preparing your garden. This entails several things as explained in the next section.
Preparing the Soil
Since gourds thrive in most places, preparing your soil is not a daunting or intimidating endeavor. The rule of the thumb is to ensure that the soil is warm and well drained. And since gourds love a lot of water, clay soil is preferable but this doesn’t mean that they won’t thrive in other types of soils.
Soil PH
Test the PH of your soil and ensure that it is between 5.8 and 6.4 which is ideal for gourds to thrive. If the PH is too high, add some peat moss to improve the acidity of the soil.
Soil Warmth
Even if the air is warm but the soil is cold, gourds will not do well. Therefore, be very vigilant when selecting a location. Ensure that there is ample sunlight and the soil in that location drains well. Let the soil be always moist but avoid puddles of water which can potentially reduce the temperatures of the soil.
Soil Fertility
Gourds thrive in light soil which contains a lot of the nutrients necessary for growth. If the soil in your garden is not fertile, add nutrient-rich compost manure or humus to improve its fertility.
If you are not sure if your soil is good enough, it will pay to have it tested by professionals. But if you are sure, its time to advance to the next step.
Spacing
If you will be growing them across your garden, it is advisable to plant them 3ft-4ft (90cm-120cm) apart. If the vines will be trained over a framework or wires, space them 18in-24in (45cm-60cm) apart since the vines will be growing upwards.
Decide whether or not to use a trellis
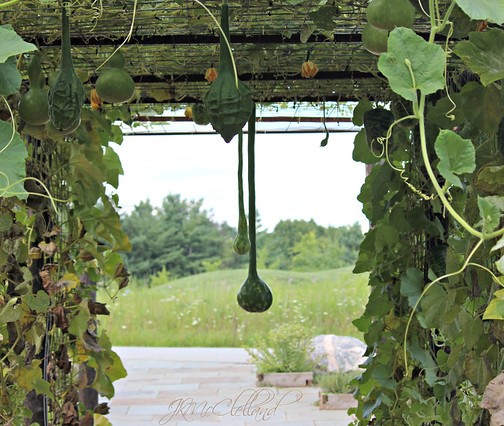
Trellises are wire or wood frameworks built to support plants off the ground. These can also be used to influence the shape and size of gourds. It is not compulsory to install trellises for your gourds since they will still do well on the ground. However, when allowed to grow on the ground, gourds will have a flat side while those on trellises will maintain a well-rounded shape. If you would rather use trellises, set the structure up before transplanting your plants. They can then be staked as they grow.
If you are growing big varieties such as bottle guards, the structure has to be strong enough to support them without falling down. Smaller varieties can be supported with tomato cages while others like the vegetable sponge gourd don’t need any support unless you want to prevent them from getting diseases.
Dig rows and create hills
To ensure that your gourds will be well fed throughout their growing period, use a shovel or trowel to dig holes measuring 38cm-45cm (15in-18in) wide for each planting station. Each of the planting pot or should be filled with well rotted compost or organic manure. Create hills and rows or small hills of earth on each hole. If you are planting several seedlings, ensure that you follow spacing directions to ensure that there is enough space between each plant for it to thrive.
Planting the gourds
Each seedling should be planted on an individual hole or hill and don’t get tempted to plant several because this will increase competition for food and water which will significantly affect the yield and the size of your fruits. The seedlings should be buried up to the base of previous depth to prevent it from rotting.
Section 5: Care for your Newly Planted Gourds
Watering
After transplanting, the seedlings should be watered thoroughly to prevent transplant shock. And since gourds are water-loving plants, water daily and ensure that the soil is always moist. When extremely hot, frequently monitor moisture level to ensure that they are well hydrated.
If you do not have the time to water frequently, cut the bottom of a plastic bottle, fill it with water and insert it at the base of every plant. This will ensure that the water is fed directly to the roots. Look it up frequently and top up the water to avoid dehydrating your plants.
If the gourds are supported trellises, ensure that the roots are moist at all times since there is little cover on the ground to prevent loss of moisture. Regularly tighten the trellises accordingly to keep up with the weight of the growing plant.
Fertilizing
After the plants have settled, they will start producing big leaves in 2 weeks. This is the most appropriate time to feed them with a generous dose of potash fertilizer such as proprietary tomato fertilizer. When the gourds begin to bear fruit, shift to nitrogenous fertilizers and apply it once in 2 weeks.
Weeding
Weeds should be removed as they germinate since these steal the precious nutrients and moisture necessary to keep your gourds growing. If your gourds are growing on the ground, carefully lift the vines and remove any weeds that lurking there.
Mulching
A layer of mulch for each plant will come in handy to prevent the loss of moisture. This is especially important if your plants are supported by trellises.
Pollination
All cucurbits plants produce both female and male flowers. Male ones appear first and are very different from female flowers. Female flowers develop with a bulge at the bottom which later develops into a fruit after pollination. Soft skin gourds bloom during the day while hard skins bloom at night.
If you notice that some of your flowers are not being pollinated, you can take charge using an artists brush. Insert the soft bristles of the brush in the male flower and make sure that pollen sticks on the bristles. Once there is enough transfer the pollen to female flowers by brushing the bristles inside the petals.
Training Ornamental Gourds
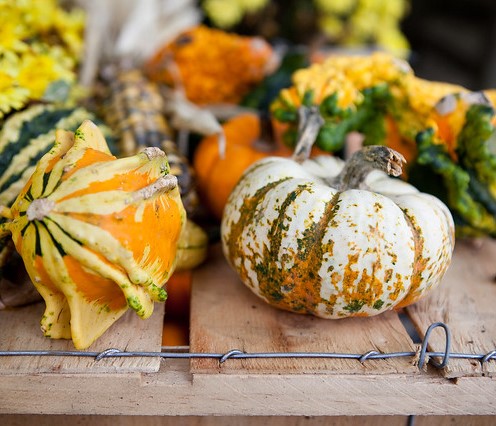
If you are growing an ornamental variety, you might want to train them to achieve interesting structures and shapes. There are two ways to achieve this, using a mold and bending the fruit. For instance, if you want a snake-like fruit, you can bend the gourd as it grows to assume that shape. On the other hand, you can place a breakable mold such as a glass vase around the fruit. As the gourd grows, it will assume its shape and all you have to do is to break the mold and retrieve the gourd.
Section 6: Gourd Problems and Solutions
Just like any other gardening endeavor, you might run across a few problems when growing gourds. However, there are very few problems to deal with when farming these magnificent fruits. Most of these issues can be treated with pesticides. Even so, use insecticides wisely because you want bees to come around and pollinate your plants.
Cucumber Beetles
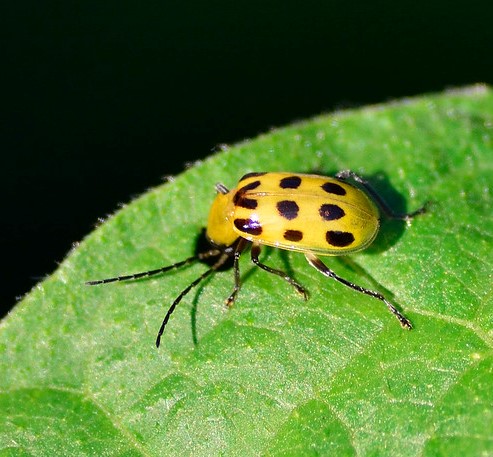
If you notice wilting yellow leaves or small holes, it could be an indicator that cucumber battles have attacked your crops. If not taken care of, it could result in yellow stunted gourds. Fortunately, there is a long-term solution to combat this menace.
Solution
Instead of using toxic pesticides, enclose your gourds with row covers to prevent the beetles from getting to them. You might also try applying some ash at the bottom of the plant since nitrogen is known to repel these bugs. Insecticides should only be a last result.
Bacterial Wilt
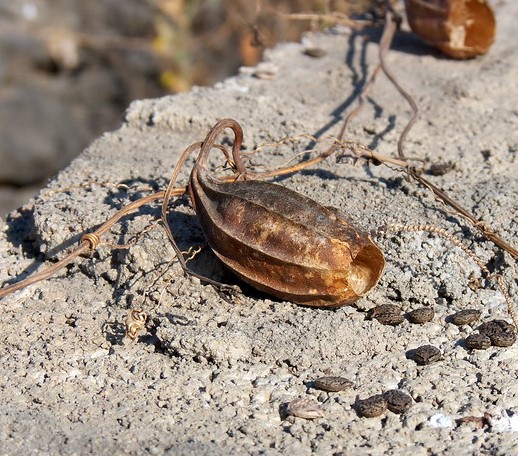
If you see some of your plants wilting, they could be infected with bacterial wilt. This bacteria prevents water from flowing freely within the plant. It is caused and spread by cucumber beetles. After chewing on an infected plant, they ahead to chew a healthy plant which eventually becomes infected. If not eliminated, cucumber beetles can potentially wipe your entire crop.
Solution
There is no known cure for bacteria wilt but you can prevent spreading by eliminating cucumber beetles and getting rid of infected plants.
Squash Bugs
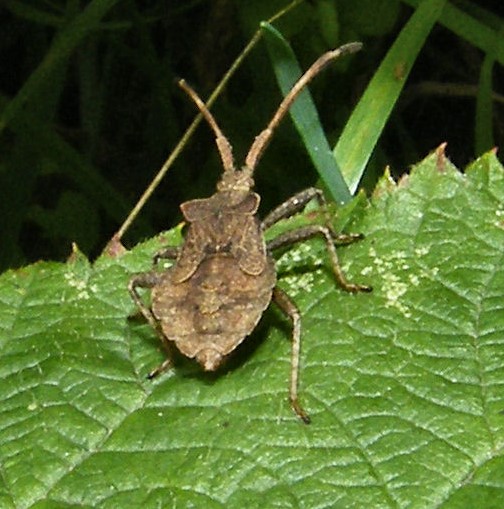
The first sign will be holes on the leaves of the gourd which are followed by the leaves turning yellow and wilting. If you notice this, your crop could be infested with squash bugs. They look more or less like stink bugs and leave marking like those done by cucumber beetles.
Solution
Apply diatomaceous earth at the bottom of the plant to repel squash bugs and if the problem is so severe, consider using an insecticide. Otherwise, you could end up losing all of your plants since these bugs spread very fast.
Cutworms
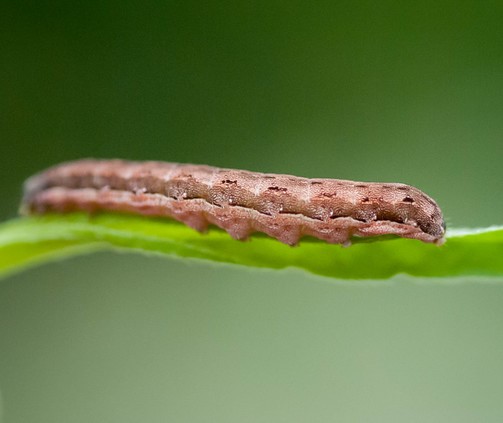
Cutworms affect many plants and you will know that they are there if you see some of your plants on the ground since they chew on the stem and leaves. They can wipe out your entire crop if not take care of.
Solution
Consider applying coffee grounds, eggshells or diatomaceous earth at the base of the pant. If this doesn’t help, use commercial insecticides to kill the cutworms since they can be disastrous.
Aphids
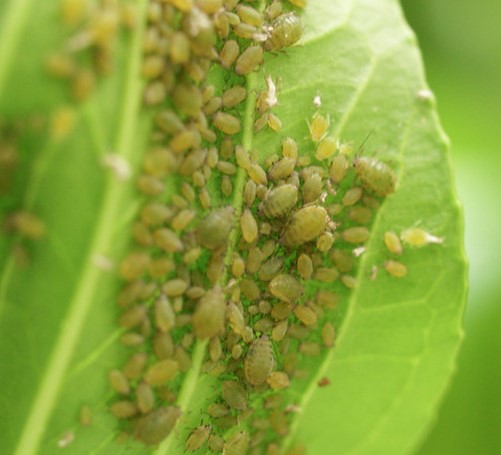
Aphids are very small parasites which feed on the juices of many plants. You might not be able to identify when the infestation is not severe but once they are in large numbers, you will see greyish matter on the gourd leaves. They produce a sticky residue and cause the plant and its fruits to become deformed.
Solution
Get rid of aphids by dusting the leaves of your gourds with flour and if this doesn’t help, consider using insecticidal soap.
Section 7: Prevention
All in all, you protect your plants from these diseases and bugs by ensuring that they are strong and healthy. Healthy plants will have more resistant to diseases also a better capacity to endure parasitic insects. These practices should help you in maintaining healthy gourds.
- Make sure the soil is moist but not waterlogged.
- Don’t congest your plants by planting several in a single hole or spacing them close to each other.
- Infected plants should be gotten rid off immediately and parasitic insects deal with accordingly.
- And if you experience any of the above problems, don’t panic. There is always a way to deal with it without losing your plant.
Section 8: Best and Worst Companion Plants
If you want your gourds to thrive, you can incorporate a few plants in your garden. These protect the gourds from diseases, pests and provide the much-needed shade when it gets too hot. And most importantly, they don’t compete with the gourds for nutrients and moisture. Some of the best companion plants for gourds include:
- Catnip
- Radishes
- Broccoli
- Dill
- Tansy
- Marigolds
Speaking on this note, there are also plants that should never be planted in the same garden as gourds since they attract pests and compete for nutrients with your dear gourds. Some of them include:
- Potatoes compete for nutrients with gourds
- Morning glories stunt the growth of fruits and vines
Section 9: Harvesting and storing Your Gourds
Harvesting
Gourds should never be cut from the vine until they have attained the right size and cured. If cut prematurely, they will begin dying from the inside and eventually rot. If you notice the vines dying, it could be an indicator that they are fully matured. Don’t cut open the gourd until they have fully cured even if they have matured.
Curing time for gourds depends on its size and variety. The bigger it is, the longer it takes to cure since the more water content it contains. Check them on a weekly basis to see if they are mature for harvesting. Check for their firmness by pressing the skin. If it feels soft, it could be rotten. If that’s the case, cut it off and dispose of it since it could be infected. When the gourd feels hard and the skin is waxy, it could be cured. Shake it as a final test and if the seeds inside produce a rattling sound, they are ready to be cut. Use a pair of shears or scissors to cut it from the vine to avoid damaging or injuring the mother plant.
If you are growing edible gourds, they should be harvested when still young since they are not edible after ripening.
Drying
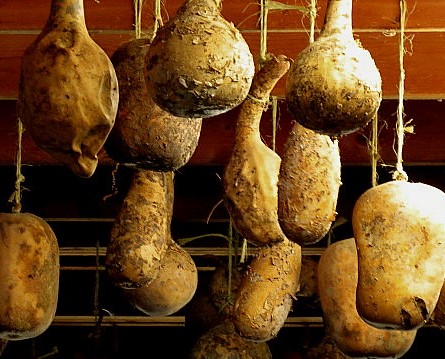
After harvesting, gourds have the tendency to grow mold on the outer skin. Therefore, look for a dry place and well-ventilated space to dry them. Small ones will just take a couple of weeks to dry while big ones might even take a year to be ready. If the weather conditions outside don’t allow you to air dry your gourds, suspend them on rafters in a well-ventilated shed. And if you have to keep them in the house, ensure that the location is dry and well ventilated to avoid spreading fungi spores in your house. Turn them frequently to ensure that they dry uniformly.
The drying period takes as long as it lasts to get rid of the gourd’s moisture content. Check them regularly to see if they are dry enough. A well-dried gourd should be hard, light with a hollow sounding consistently. You should also hear the seeds rattling inside. At this juncture, they could be ready for cleaning.
Cleaning
To clean your gourds, you’ll want to put it in a pan of bleach water. This will kill the mold that has formed on the gourd while drying.
After harvesting, it is important to clean your gourds in bleach water to kill any mold that might have grown when curing. After that, use a rough sponge to peel off the skin of the gourds and ensure that the skin is wet when doing this to avoid injuring it. Puncture holes or deep scraps can still damage the fruit at this stage so be very careful. After all, they is no need for enduring the grueling growing period only for you to destroy the fruit at its final stage.
After the through clean up rinse the gourd off with clean water, dry them under the sun and get creative carving.
Treat the Shell of the Gourd
Though not necessary, you can apply some treatment on the gourds’ skin to transform its appearance and extend its lifespan. After washing the gourd and scrapping it using sandpaper, apply a coat of shellac and wax to complete the shine of the skin. Painting the gourd will also protect it from the elements and eventually improve its life span since the inner skin is protected by the paint.
Consider Saving the Seeds
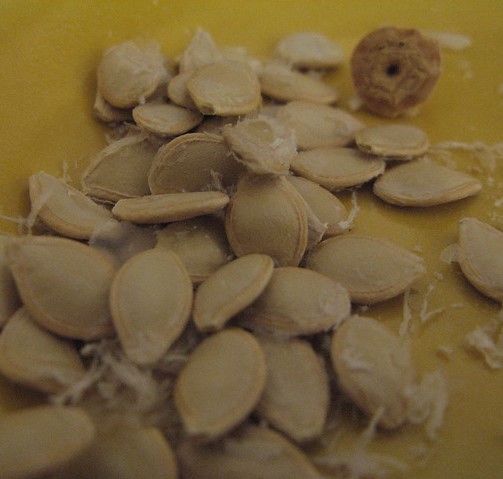
If left uncut, your gourd can last for several years with the seeds inside. However, if you are thinking of planting next season, look for a healthy one, split it into two and remove seeds. Sundry the seeds for a few days to increase their viability and store them for use next season. Your split gourd can be used as a bowl, ladle or for any other functional or artistic use. Plus you will have several other gourds next season.
Bottom line
Plain and simple, gourds are easy and fun to grow. Plus you don’t need to be a professional to grow these colorful and artistic fruits. All you need is this elaborate guide to take you through the entire process from the first step to the last. And once you’ve grown them, don’t forget to save a few seeds for next season. Happy and fruitful farming!


