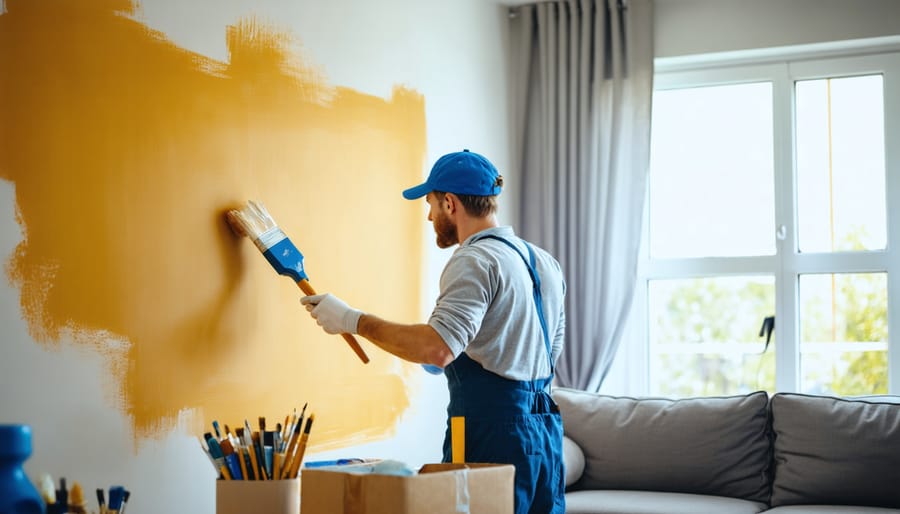
Transform bare wood cabinet doors into showroom-worthy centerpieces by mastering three essential techniques that separate amateur finishes from professional results. Sand progressively through 120, 180, and 220-grit paper to create the ultra-smooth foundation that prevents brush strokes from telegraphing through your topcoat. Remove every trace of sanding dust with a tack cloth followed by a light wipe with mineral spirits, because even microscopic particles will create rough patches that catch light and ruin your finish. Apply thin, even coats rather than trying to achieve full coverage in one pass, letting each layer dry completely before adding the next.
The difference between cabinets that look painted and those that appear factory-finished comes down to patience and preparation. Most DIYers rush the drying process or skip crucial prep steps, resulting in tacky surfaces, visible brush marks, and premature chipping. Your choice of applicator matters tremendously: foam rollers create orange-peel texture, cheap brushes leave bristle marks, while quality synthetic brushes or paint sprayers deliver that coveted glass-like smoothness.
This guide walks you through each decision point from selecting the right finish for your kitchen’s humidity levels to achieving professional-grade results with equipment you likely already own. Whether you’re updating tired oak cabinets or finishing new unfinished doors, you’ll discover the specific techniques that eliminate guesswork and deliver consistent, beautiful results that last for years. Your kitchen transformation starts with understanding that exceptional finishes aren’t about expensive products but rather about proper technique and strategic patience.
Why Your Cabinet Door Finish Matters More Than You Think
Think about everything your cabinet doors endure on a daily basis. Sticky fingerprints from cooking, splashes from washing dishes, the occasional bump from a pot handle, and constant opening and closing that puts stress on every surface. Unlike your walls or even countertops, cabinet doors are in the front lines of kitchen activity, taking a beating day after day, year after year.
That’s exactly why the finish you choose matters so much more than many homeowners realize. A quality finish isn’t just about creating a beautiful look, though that’s certainly part of the equation. It’s your cabinet doors’ first line of defense against moisture, grease, impacts, and UV light that can cause fading over time. Skimp on this crucial step, and you’ll find yourself dealing with chipping, peeling, or discoloration within months rather than years.
Here’s something that might surprise you: a professionally finished cabinet can add significant value to your home. Real estate professionals consistently point to kitchens as major selling points, and nothing screams “dated” or “poorly maintained” like cabinets with a worn, dingy finish. Conversely, cabinets with a smooth, durable, high-quality finish signal that the home has been well cared for.
The good news? Achieving that professional-grade finish is absolutely within your reach as a DIYer. You don’t need to settle for contractor pricing when you understand the right techniques and products. The difference between a finish that disappoints and one that delights often comes down to proper preparation, patience during application, and choosing products designed specifically for the high-traffic life of cabinet doors. When you invest time in doing it right, you’re not just updating your kitchen, you’re protecting your investment for years to come.
Prep Work: The Secret That Separates Pros from Amateurs
Cleaning and Degreasing Like You Mean It
Here’s the truth about cabinet finishing: even the most expensive paint won’t stick to greasy surfaces. Those cabinet doors have been collecting cooking oils, fingerprints, and everyday grime for years, creating an invisible barrier that’ll ruin your hard work if not properly addressed.
Start with a degreasing cleaner specifically designed for kitchen surfaces. TSP (trisodium phosphate) is the gold standard for serious cleaning, though TSP-substitute products work well if you prefer something less harsh. Mix according to package directions and work in sections, applying the solution with a sponge or soft cloth.
Here’s where elbow grease matters. Don’t just wipe – scrub those surfaces, paying extra attention to areas around handles and edges where oils accumulate. Rinse thoroughly with clean water to remove all cleaner residue, as leftover chemicals can interfere with paint adhesion.
For stubborn buildup, a second cleaning pass makes all the difference. Think of this step as part of your interior painting preparation – it’s not glamorous, but it’s essential. Let the doors dry completely, ideally overnight, before moving to the next step. Run your hand across the surface; it should feel squeaky clean, not tacky or slick.

Sanding: The Right Grit for Every Situation
Choosing the right sandpaper grit can make the difference between a smooth, professional-looking finish and a frustrating do-over. Think of sanding as a gradual progression, starting coarse and working your way to smooth perfection.
For painted cabinets, start with 100-120 grit to remove the existing finish and create a clean surface. If you’re working with solid wood doors that need more aggressive stripping, 80 grit gets the job done faster, but be careful not to gouge the wood. Once you’ve removed the old finish, switch to 150 grit to smooth out any scratches left by the coarser paper. Your final pass should be with 220 grit, which creates that silky-smooth surface that makes paint or stain adhere beautifully.
Laminate or veneer doors require a gentler touch. Skip the heavy-duty grits and stick with 150-180 grit for scuffing the surface. Going too aggressive can damage the thin veneer layer, and nobody wants to deal with that headache.
Now, about power versus hand sanding. An orbital sander saves tons of time and energy on flat surfaces, keeping the pressure even and consistent. However, save it for the main door panels. Hand sanding is your best friend for detailed areas, edges, and any decorative elements where a power sander might cause damage or uneven spots. Keep a sanding block handy for maintaining flat surfaces when hand sanding.
Always sand with the grain on wood surfaces to avoid creating scratches that’ll show through your finish. Trust me, this simple rule prevents so much heartache later.

Primer Selection That Sets You Up for Success
Choosing the right primer is like picking the perfect foundation for your makeup—it makes everything that follows look better and last longer! Let’s break down your primer options so you can make the best choice for your cabinets.
For solid wood cabinets, especially if you’re painting over stained wood, an oil-based or shellac-based primer works wonders at blocking tannins and preventing bleed-through. These primers create a rock-solid base that keeps those pesky yellow or brown stains from sneaking through your beautiful new finish. Water-based primers are fantastic for raw wood or previously painted surfaces, offering easier cleanup and lower fumes.
Working with laminate or melamine cabinets? You’ll need a bonding primer specifically designed for slick surfaces. Regular primer simply won’t grip properly, leading to chips and peeling down the road. Trust me, skipping this step is a heartbreak waiting to happen.
MDF cabinet doors are super absorbent, so they’ll drink up whatever you apply. A quality sealing primer prevents excessive paint absorption and ensures a smooth, even topcoat. Plan on at least two coats for MDF to achieve professional results.
When can you skip primer? If your cabinets are already painted in good condition and you’re using a paint-and-primer-in-one product in a similar color, you might get away without it. However, for dramatic color changes or better durability, primer remains your best friend. It’s that extra step that separates okay results from wow-worthy transformations.
Choosing Your Finish: Paint vs. Stain vs. Clear Coat
When Paint Is Your Best Friend
Paint is truly a cabinet door’s best friend when you’re working with less-than-perfect wood or looking to achieve that crisp, contemporary aesthetic. Unlike stains that highlight every flaw, paint provides excellent coverage while giving you complete control over the final look. Plus, it’s incredibly durable when applied correctly, standing up to the daily wear and tear that kitchen cabinets endure.
The magic of paint finish selection lies in choosing the right sheen for your space. Matte finishes offer a sophisticated, on-trend appearance that hides minor surface imperfections beautifully, though they’re slightly harder to clean. Satin strikes that perfect middle ground, providing subtle luster while remaining practical for everyday use. Semi-gloss remains the kitchen favorite for good reason: it’s highly durable, moisture-resistant, and wipes clean effortlessly, making it ideal for high-traffic areas.
Consider your lifestyle when deciding. If you’ve got a busy household with little hands constantly grabbing cabinet doors, semi-gloss will be your workhorse. For a powder room or less-used spaces, matte or satin finishes can deliver that designer touch you’re after without sacrificing functionality.
Staining for Natural Wood Beauty
Staining transforms plain wood cabinet doors into stunning focal points that showcase natural grain patterns. Before you begin, test your chosen stain color on a hidden area or scrap piece—colors can look dramatically different once absorbed into wood. Popular options range from warm honey tones and rich walnut browns to contemporary gray-washed finishes that blend traditional and modern aesthetics.
For even application, work with the grain using a foam brush or lint-free cloth, applying thin coats rather than one heavy layer. This prevents blotching and allows you to build up to your desired depth gradually. Keep a wet edge as you go, meaning you should never let one section dry before blending into the next area.
Pro tip: Pre-stain wood conditioner is your secret weapon for preventing uneven absorption, especially on softer woods like pine or maple. Apply it fifteen minutes before staining, and you’ll achieve that professional, streak-free finish that makes people think you hired experts. Remember, patience pays off—allow adequate drying time between coats for results you’ll love for years.
Clear Coats and Protective Topcoats
Now comes the exciting moment where you lock in all that beautiful color with a protective shield. Think of clear coats as the bodyguard for your freshly painted cabinets, defending against fingerprints, moisture, and daily wear.
Polyurethane stands as the heavyweight champion of durability. Water-based versions dry quickly with minimal odor and won’t yellow over time, making them perfect for white or light-colored cabinets. Oil-based polyurethane offers incredible toughness and a warm amber glow that enhances wood tones beautifully, though it requires longer drying times and better ventilation.
Lacquer delivers that coveted factory-finish look with its crystal-clear, ultra-smooth surface. It dries lightning-fast and self-levels wonderfully, though you’ll need a spray setup for best results. Pre-catalyzed lacquer offers enhanced durability without the complicated mixing.
For a more traditional approach, consider polycrylic, which combines easy cleanup with excellent protection, or paste wax for vintage pieces needing a softer sheen.
Whatever you choose, apply thin coats and lightly sand between applications with 320-grit paper. This simple step ensures each layer bonds properly, creating a finish that looks professionally done and stands up to years of use.
Application Techniques That Prevent Common Mistakes
Brush, Roller, or Spray: Choosing Your Weapon
Your choice of application method can make or break your cabinet finishing project, so let’s find your perfect match. Brushing offers the most control and works beautifully for detailed areas and smaller projects. It’s the most forgiving method for beginners, though you’ll need a quality synthetic brush to avoid bristle marks. Expect to spend more time, but you’ll gain precision that’s hard to beat.
Rollers are your middle-ground champion, covering flat surfaces quickly while maintaining good control. A foam roller creates surprisingly smooth finishes on cabinet doors, especially when you’re tackling multiple pieces. The technique is easier to master than spraying, making it ideal for intermediate DIYers who want efficiency without a steep learning curve.
Spraying delivers that coveted factory-smooth finish, but it demands more preparation and practice. You’ll need proper ventilation, masking materials, and should familiarize yourself with spray paint safety before starting. HVLP sprayers offer better control than aerosol cans for larger projects, though they require investment and cleanup time.
For most home projects, consider a hybrid approach: spray or roll the flat door panels for speed and smoothness, then brush the detailed edges and profiles where precision matters most. This combination gives you professional results while keeping the process manageable and enjoyable.

The Two-Coat Minimum Rule (and When You Need Three)
Here’s the truth about coating cabinet doors: two coats is your baseline, but three might become your best friend. Think of it like painting a wall—one coat rarely gives you that flawless, professional finish you’re after.
For your first coat, apply a thin, even layer and resist the urge to go heavy. A thick coat might seem efficient, but it actually leads to drips, uneven drying, and a less durable finish. After applying, let it dry completely according to your product’s instructions—typically 4 to 6 hours for water-based finishes and up to 24 hours for oil-based options.
Between coats, lightly sand with 320-grit sandpaper to knock down any dust nibs or imperfections. This step creates better adhesion for your next layer and contributes to that silky-smooth surface everyone admires.
Your second coat should go on just as carefully as the first. Once dry, step back and evaluate under good lighting. Do you see any wood grain showing through? Are there spots where the sheen looks inconsistent? These are signs you need a third coat.
Dark stains over light wood, vibrant colors, and high-traffic kitchen cabinets almost always benefit from that extra layer of protection. It’s not admitting defeat—it’s choosing excellence over just good enough.
Avoiding Drips, Runs, and Orange Peel Texture
Nothing ruins a beautiful cabinet makeover faster than those frustrating drips, runs, and that bumpy orange peel texture. The good news? These issues are totally preventable with the right approach.
Start with your brush loading technique. Whether you’re using a brush or foam applicator, less is definitely more. Dip only the bottom third of your bristles into your finish, then gently tap off the excess against the inside of the can. Resist the urge to wipe it on the rim, which creates bubbles that transfer right onto your cabinet surface.
If you’re spraying, maintain a consistent 8-10 inch distance from the door. Moving too close creates heavy buildup and runs, while staying too far away produces that dreaded orange peel effect. Keep your spray gun moving in smooth, overlapping passes at a steady pace.
Environmental conditions matter more than you might think. Aim for temperatures between 65-75 degrees Fahrenheit with moderate humidity. Hot, humid days cause finishes to dry too slowly, inviting drips and dust. Cold conditions prevent proper flow and leveling.
Apply thin, even coats rather than trying to achieve full coverage in one pass. Multiple light layers always beat one thick application. If you do spot a drip, let it dry completely before gently sanding it smooth and recoating. Patience during application saves hours of frustrating fixes later.
Drying and Curing: Patience Pays Off
Here’s the thing about finishing that catches most DIYers off guard: there’s a massive difference between dry-to-touch and fully cured. Touch that cabinet door after a few hours and it might feel ready to reinstall, but don’t be fooled. You’ll end up with fingerprints, smudges, or worse—doors that stick together like they’re holding hands.
Let’s break down the timeline realistically. Most finishes feel dry within 1-4 hours, which is tempting fate if you rush ahead. However, full curing—when the finish reaches maximum hardness and durability—takes considerably longer. Water-based polyurethane typically cures in about 21 days, while oil-based versions need a full 30 days to reach peak performance. Yes, you read that correctly: weeks, not hours.
Why does this matter? Installing doors before they’re fully cured means you risk marring the surface every time you open a cabinet. That beautiful finish you worked so hard to achieve can end up with mysterious dings and impressions that seemingly appear from nowhere.
Create optimal drying conditions by maintaining temperatures between 70-77 degrees Fahrenheit with moderate humidity around 50 percent. Avoid drying in basements or garages where temperature swings wildly. Good air circulation helps, but don’t aim fans directly at wet finishes—you’ll create dust magnets and uneven drying.
Stack doors carefully if space is tight, using small finishing nails poked through cardboard scraps as miniature sawhorses. This keeps surfaces elevated and prevents contact points.
I know waiting feels counterproductive when you’re excited to see your transformation complete, but patience during this final stage protects all your previous effort. Think of curing time as your finish developing superpowers—it’s worth the wait.

Hardware Considerations and Reassembly
You’ve invested time and effort into achieving that beautiful finish, so don’t let the final steps trip you up! Hardware decisions can make or break your cabinet transformation, and proper reassembly ensures your hard work lasts for years.
Before reinstalling your old hardware, give it a good look. Are the hinges rusted or bent? Do the pulls feel loose or dated? Sometimes fresh hardware is worth the investment, especially when your gorgeous new finish deserves equally impressive accents. Consider this your chance to update the style too. Sleek brushed nickel pulls can modernize traditional cabinetry, while vintage-inspired knobs add character to a clean white finish.
If you’re keeping existing hardware, clean it thoroughly with appropriate metal cleaners. A little polish can make old brass or bronze look brand new and complement your refinished doors beautifully.
Timing matters when reattaching hardware. Wait until your finish has fully cured, typically 24 to 72 hours depending on your product. Rushing this step risks fingerprints, smudges, or worse, permanent impressions in soft finishes.
During reinstallation, protect your work with a soft cloth underneath the door. Use a power drill on low speed to avoid over-tightening screws, which can crack fresh finishes or strip holes. Mark your hinge placements with painter’s tape before drilling to prevent slips that could scratch your perfect surface.
Here’s a pro tip: if installing new hardware requires different hole placements, fill old holes with wood filler before finishing begins. This creates a seamless look and prevents awkward patches showing through your beautiful new cabinet doors.
You’ve got this! Finishing cabinet doors might have seemed daunting when you started reading, but with the proper techniques and a little patience, those professional-looking results are absolutely within your reach. The beauty of these skills is that they transfer beautifully to other projects around your home, from freshening up interior doors to transforming tired trim work.
Remember, the magic happens in the preparation and the patience to apply thin, even coats. Take your time, work methodically, and don’t rush the drying process between applications. Every careful stroke brings you closer to that showroom-quality finish you’ve been envisioning.
Of course, if you’re short on time or tackling an especially large project, there’s no shame in hiring professional painters to handle the heavy lifting. But for those ready to dive in, there’s something incredibly satisfying about stepping back and admiring cabinets you’ve transformed yourself. Your kitchen or bathroom is about to get that fresh, updated look you’ve been craving, and you’ll have the pride of knowing you made it happen!