Transform your spare corner, garage, or basement into a powerhouse training zone with just one piece of equipment: an adjustable kettlebell. You don’t need an expensive gym membership or a room full of machines to build serious core strength. A single kettlebell tucked into a dedicated workout nook can deliver the kind of midsection-sculpting results that translate to better posture, reduced back pain, and the functional strength you need for everyday tasks like lifting furniture, carrying groceries, or tackling weekend renovation projects.
The beauty of kettlebell training lies in its efficiency. Unlike traditional crunches that isolate one muscle group, kettlebell exercises engage your entire core through dynamic, full-body movements that challenge your stability and coordination. This makes them perfect for busy homeowners who want maximum results in minimal time, right in the comfort of their own space.
Setting up your home kettlebell station takes virtually no space. Designate a 6-by-6-foot area with adequate flooring protection, ensure proper ventilation, and keep your kettlebell stored within easy reach on a simple shelf or mat. This accessibility means you’re more likely to stick with your routine, turning those fitness goals into lasting habits. The four exercises ahead will show you exactly how to leverage this versatile tool for a stronger, more resilient core that supports everything you do, both in your workouts and your home improvement adventures.
Why Your Home Gym Needs Adjustable Kettlebells
If you’re carving out a home gym space, even in the smallest apartment or corner of your basement, adjustable kettlebells are absolute game-changers. Think about it: traditional kettlebell sets can eat up serious square footage and turn your workout area into a cluttered obstacle course. One adjustable option replaces an entire rack of bells, freeing up valuable real estate for other equipment or simply keeping your space feeling open and inviting.
Here’s where it gets really practical for home improvement enthusiasts like us. You can finally create that dedicated workout corner without sacrificing an entire room. Tuck your adjustable kettlebell on a small shelf, in a stylish storage basket, or even on a compact wall-mounted rack you can DIY in an afternoon. The minimal footprint means you’re working smarter, not harder, with your available space.
Beyond the space-saving magic, adjustable kettlebells grow alongside your fitness journey. As you progressively strengthen your core through the exercises we’ll cover, you simply adjust the weight without purchasing new equipment. This adaptability is perfect for core training specifically, since different exercises demand different loads. Your Russian twists might feel comfortable at 15 pounds while your windmills require 25 pounds, and you can switch between them in seconds.
For homeowners who appreciate both function and aesthetics, modern adjustable kettlebells look sleek and intentional rather than gym-messy. They signal that you’ve thoughtfully designed your space with purpose. Plus, investing in quality adjustable equipment now means you’re building a sustainable home fitness solution that adapts to your needs for years to come, much like any worthwhile home improvement project.

The Four Essential Kettlebell Core Exercises
Turkish Get-Up: The Full-Body Core Builder
If you’ve ever tried to stand up from the floor while carefully balancing a full paint can above your head (maybe after that last ceiling touch-up project), you’ve essentially performed a Turkish get-up. This ancient movement pattern is hands-down the most comprehensive core stabilizer in your kettlebell toolkit, engaging every muscle from your shoulders to your hips through a controlled, multi-step transition from lying down to standing.
Here’s how to master this full-body builder. Start by lying on your back, holding your kettlebell straight up with your right arm, keeping your eyes on it throughout the movement. Bend your right knee with your foot flat on the floor. Using your left elbow for support, prop yourself up, then push through to your left hand. Next, lift your hips and sweep your left leg underneath, landing on your left knee in a kneeling position. Finally, stand up while maintaining that kettlebell overhead, then reverse the entire sequence to return to the starting position.
Think of it as a carefully choreographed dance where your core acts as the conductor, maintaining perfect stability while your body navigates through seven distinct positions. This isn’t about speed; it’s about control and precision.
For beginners, start with an adjustable kettlebell set to just 5-10 pounds, or even practice with no weight until the movement pattern feels natural. You can also modify by performing only the first half, stopping at the seated position before reversing back down. As your confidence and stability improve, gradually increase the weight. Aim for 3-5 repetitions per side, taking your time with each transition to build rock-solid core strength and body awareness.

Kettlebell Windmill: Strength Meets Flexibility
The kettlebell windmill is like the yoga pose of strength training—it challenges your balance, flexibility, and core control all at once. Think of it as creating a dynamic triangle with your body while your obliques work overtime to keep everything stable.
Start by standing with your feet shoulder-width apart, holding a kettlebell in your right hand. Press it overhead and keep your eyes on it throughout the movement—this visual anchor helps maintain proper form. Now, here’s where the magic happens: push your hips to the right while keeping that arm locked out overhead. As you bend at the waist toward your left side, your left hand slides down your left leg. Your torso rotates slightly, creating that windmill effect. Go as low as your flexibility allows, feeling a deep stretch through your side body while your obliques engage to control the descent and return.
When you’re setting up your home gym space, starting with a lighter kettlebell for windmills is smart—even if you can press heavier weights overhead. This exercise demands respect because it combines mobility with strength in ways that can feel awkward initially.
The biggest mistake? Rushing the movement. This isn’t a race. Your shoulder needs to stay packed and stable, and bending your knees too much defeats the flexibility component. Another common error is looking down instead of at the kettlebell, which throws off your alignment.
As you progress, gradually increase weight only when you can complete full sets with perfect form. Your obliques and shoulders will thank you for the patience.
Russian Twist: Target Those Obliques
Ready to add some serious definition to those obliques? The Russian twist is your secret weapon for sculpting that enviable side profile while building rotational strength. Think of this exercise as the finishing touch on your core workout, much like choosing the perfect hardware completes a kitchen renovation.
Start by sitting on your workout mat with knees bent and feet flat on the floor. Hold your kettlebell close to your chest with both hands, then lean back slightly until you feel your core engage. Here’s where the magic happens: lift your feet a few inches off the ground to really challenge your balance. Now, rotate your torso to the right, bringing the kettlebell toward the floor beside your hip, then smoothly twist to the left. That’s one complete rep.
The key to protecting your lower back is maintaining that slight backward lean throughout the movement without rounding your spine. Imagine there’s a string pulling your chest up toward the ceiling. Your breathing rhythm matters too: exhale as you twist to each side, inhale as you return to center.
Starting out? Begin with a lighter kettlebell or even just your body weight to master the form. As you get stronger, gradually increase the weight. You can also adjust the difficulty by how high you lift your feet or how far back you lean. Aim for 10 to 15 twists per side, and you’ll feel those obliques working harder than a weekend warrior tackling their first built-in shelving project.
Kettlebell Plank Pull-Through: Dynamic Core Control
This dynamic movement takes your core stability to the next level by introducing rotation resistance while maintaining a solid plank position. Think of it as teaching your midsection to stay rock-solid while your arms are moving, much like how your core stabilizes you when you’re reaching across to paint a far corner without losing your balance on a ladder.
Start by mastering the bodyweight version first. Get into a high plank position with your feet slightly wider than hip-width apart for stability. This wider stance creates a more stable base, similar to how you’d position yourself when working on an overhead home project. Place a light object, like a water bottle, just outside your right hand. Reach your left hand underneath your torso, grab the object, and pull it across to the left side. Return to plank, then repeat from the other side. Your hips should barely rotate during this movement.
Once you can complete 10 pull-throughs per side without your hips twisting, you’re ready to add a kettlebell. Begin with the lightest weight available in your home gym, typically 5 to 10 pounds. The goal isn’t to go heavy here; it’s about controlled movement while fighting rotation.
As you progress, gradually increase the weight, but only when you can maintain perfect form. Your core should feel like it’s working overtime to prevent your body from rotating, building that functional strength that translates to everything from carrying groceries to maneuvering furniture during your next room makeover. Aim for three sets of 6 to 8 pull-throughs per side.

Setting Up Your Home Workout Space for Success
Creating a dedicated kettlebell training zone in your home doesn’t require a complete room makeover, just some thoughtful planning. Think of it as carving out a functional corner that works as hard as you do while still looking great.
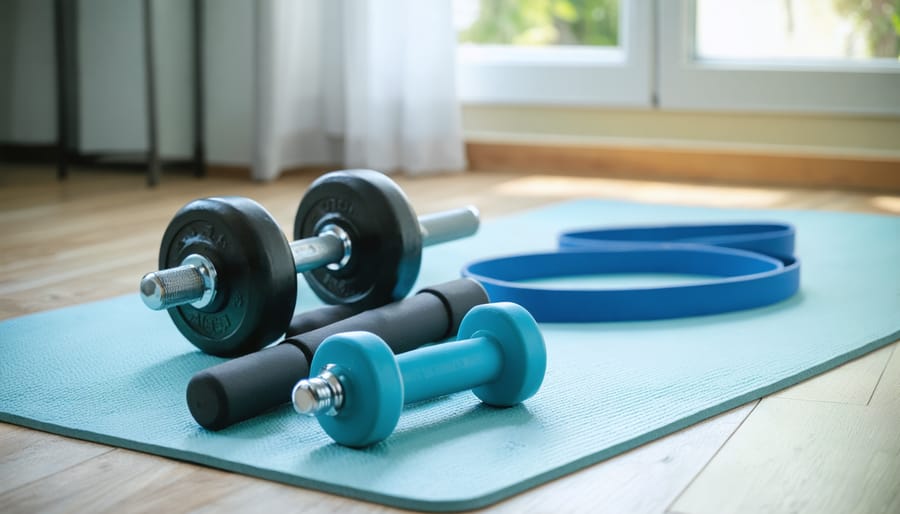
Start with your flooring, which takes the biggest beating during kettlebell workouts. If you’re working on hardwood or tile, invest in interlocking rubber floor mats or a durable rubber mat at least 6×6 feet. These protect your floors from accidental drops and provide cushioning for your joints. Bonus: they’re easy to clean after those sweaty sessions and come in sleek designs that won’t scream “gym equipment dumping ground.”
Mirror placement makes a huge difference for checking your form during exercises. A full-length mirror positioned on one wall lets you spot alignment issues before they become problems. You don’t need fancy gym mirrors either; a large affordable mirror from a home improvement store works perfectly. Just secure it properly to the wall for safety.
When it comes to organizing your fitness equipment, adjustable kettlebells are space-saving champions. Store them on a small wall-mounted shelf or a compact three-tier rack that doubles as an industrial-chic accent piece. Look for storage solutions in matte black or natural wood finishes that complement your existing decor.
The secret to successful integration is treating your workout space like any other room in your home. Designing your home gym layout with intention means your kettlebell corner enhances your space rather than cluttering it. Add a small plant, keep a basket for towels nearby, and suddenly your fitness area feels like a natural extension of your home.
Your Weekly Core Routine: Putting It All Together
Now that you’ve got your four core-crushing exercises down, let’s create a realistic weekly routine that fits into your life. Think of this as your blueprint for building serious core strength right in your home gym.
Start with three workouts per week, giving yourself at least one rest day between sessions. Monday, Wednesday, and Friday work great for most people, leaving weekends free for other activities. Each workout should include all four exercises: the kettlebell swing, Turkish get-up, windmill, and Russian twist.
Begin with 3 sets of 8-10 reps for each exercise, using a weight that feels challenging but allows you to maintain proper form. For Turkish get-ups, aim for 3-5 reps per side since they’re more complex. As a beginner, you might start with a 15-20 pound adjustable kettlebell, gradually adding weight plates as you gain confidence.
Here’s where your adjustable kettlebell really shines: increase the weight by 2-5 pounds every two to three weeks, or whenever your current weight starts feeling too comfortable. This progressive overload is key to continued improvement.
Track your progress in a simple notebook or phone app, jotting down weights, reps, and how you felt during each session. Take progress photos monthly and notice how your posture improves and everyday movements become easier.
Stay motivated by setting small milestones, like mastering your first Turkish get-up without wobbling or completing all sets without breaking form. Celebrate these wins. Your dedicated home gym space deserves to see you succeed, and consistency beats perfection every single time.
Building core strength at home is more than just a fitness goal—it’s an investment in yourself that perfectly complements the care you put into your living space. Just as you thoughtfully select paint colors, arrange furniture, and create welcoming rooms, dedicating a corner of your home to fitness shows the same commitment to improvement and well-being. These four kettlebell exercises prove that transforming your core strength doesn’t require a gym membership or a room full of equipment. With just one adjustable kettlebell and a small workout area, you have everything needed to build real, functional strength.
Think of upgrading your home gym as another rewarding home improvement project—one that pays dividends in energy, confidence, and health. The beauty of kettlebell training lies in its simplicity and effectiveness. You’ve already taken the first step by learning these exercises. Now it’s time to make them part of your routine, creating a healthier you within the home you love. Your space is ready, your equipment is minimal, and your stronger core is waiting.