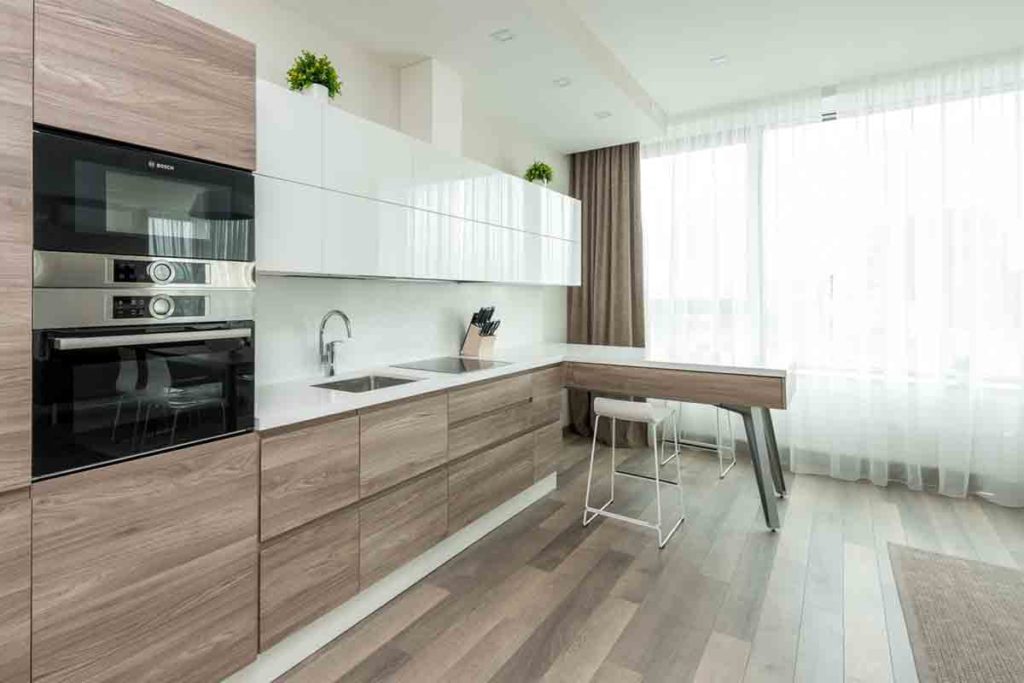
Transform your space with Style Selections laminate flooring – a DIY project that delivers professional results at a fraction of traditional hardwood costs. As one of the best laminate flooring options for durability and style, this modern flooring solution installs without specialized tools or professional expertise. In just a weekend, you can completely revitalize any room using the click-and-lock installation system, which creates a seamless floating floor that resists moisture and wear. Whether you’re upgrading your living room or renovating your entire home, this step-by-step guide will walk you through the proper techniques to achieve a flawless installation that looks and feels like real hardwood. With proper preparation and attention to detail, you’ll master the essential skills to lay a beautiful, long-lasting floor that adds value to your home.
Preparation and Materials
Required Tools and Materials
Before diving into your installation project, gather all the necessary tools and materials. After choosing the right flooring, ensure you have:
Essential Tools:
– Tape measure and pencil
– Safety glasses and knee pads
– Utility knife with spare blades
– Pull bar and tapping block
– Circular saw or laminate cutter
– Rubber mallet
– Spacers (1/4 inch)
– Level (2-foot and 6-foot)
– Moisture meter
– Vacuum cleaner
Required Materials:
– Style Selections laminate flooring (calculate square footage plus 10% extra)
– Underlayment (unless included with flooring)
– Transition strips for doorways
– Baseboards or quarter round molding
– Construction adhesive
– Vapor barrier if installing over concrete
– Cleaning supplies for prep and final cleanup
Pro tip: Having everything ready before you start will make the installation process smoother and help you avoid frustrating mid-project hardware store runs. Double-check your measurements and material quantities to ensure you have sufficient supplies for the entire project.

Room Preparation
Before diving into the installation, proper room preparation is crucial for a successful laminate flooring project. Start by removing all furniture, baseboards, and existing flooring from the room. Thoroughly clean the subfloor, removing any debris, dust, or old adhesive residue.
Check your subfloor for any signs of damage, loose boards, or uneven spots. Use a level to identify any areas that need attention – the surface should be flat within 3/16 inch over an 8-foot span. Fill any gaps or low spots with floor leveling compound and sand down any high spots.
The room’s climate is equally important. Let your laminate flooring acclimate to the room’s conditions for at least 48 hours before installation by storing the unopened boxes in the space. Maintain a room temperature between 65-85°F and relative humidity between 35-65% during and after installation.
Install a moisture barrier if you’re working on a concrete subfloor or in areas prone to moisture. For wood subfloors, ensure adequate ventilation beneath the house to prevent future moisture problems. Finally, plan your layout by measuring the room’s width and length, accounting for expansion gaps around the perimeter.
Installation Process
Moisture Barrier Installation
Before laying your Style Selections laminate flooring, it’s essential to install a proper moisture barrier to protect your investment. This thin layer of protection acts as a shield between your subfloor and your beautiful new laminate, preventing moisture from seeping up and potentially warping or damaging your flooring.
Start by thoroughly cleaning your subfloor, removing any debris or dirt that could create bumps under your barrier. Roll out the moisture barrier material (usually a plastic sheeting or specialized underlayment) across your floor, making sure to overlap the seams by about 6 inches. For extra protection, use waterproof tape to secure these overlaps.
When working around the room’s perimeter, extend the moisture barrier about 2 inches up the walls. This creates a continuous moisture-proof basin that’ll keep your flooring safe and dry. If you’re using separate underlayment, make sure to lay it in the same direction you plan to install your laminate planks.
Pro tip: While it might be tempting to cut corners here, don’t skip this crucial step! A properly installed moisture barrier can extend the life of your flooring by years, especially in areas prone to humidity or moisture issues. Take your time to smooth out any wrinkles or bubbles in the barrier – these imperfections could affect how your laminate flooring lies later on.
First Row Installation
The first row sets the foundation for your entire laminate flooring installation, so it’s crucial to get it right. Start by measuring the width of your room and divide it by the width of a plank. This calculation helps you determine if you’ll need to cut the first row lengthwise to ensure your last row isn’t too narrow. Ideally, both first and last rows should be at least 2 inches wide for stability and aesthetics.
Begin placing your first row along the longest straight wall, using spacers to maintain a 3/8-inch expansion gap between the planks and the wall. This gap is essential as laminate flooring naturally expands and contracts with temperature changes. Position the groove side facing the wall and the tongue facing out into the room.
When connecting the planks in your first row, angle each subsequent piece at roughly 45 degrees and gently lower it into place, ensuring the short ends lock together firmly. You should hear a subtle click when they’re properly connected. Check that the seams are tight and the planks are perfectly aligned with your chalk line.
For the last piece in your first row, measure the distance from the end of your last full plank to the wall (remembering to account for the expansion gap). Mark and cut your plank to size using a power saw or laminate cutter. If the cut piece is less than 8 inches long, you might want to cut both the first and last pieces of the row for better stability.
Before moving on to the next row, double-check that your first row is absolutely straight using your chalk line as a reference. Any deviation here will become more noticeable as you continue installing additional rows. Also, ensure all spacers are firmly in place and your expansion gap is consistent along the entire wall.
Continuing the Installation
Now that you’ve got your first row in place, it’s time to tackle the rest of the room. Start your second row with the leftover piece from your first row’s final cut (if it’s at least 6 inches long). This staggered pattern not only looks more professional but also adds structural stability to your floor.
For each new row, angle the plank at roughly 45 degrees along the long edge of the previous row. Gently lower it while ensuring the short end connects with the neighboring plank. You should hear that satisfying click that tells you everything’s locked in place. If you don’t hear the click, lift the plank slightly and try again – forcing it won’t do you any favors!
When you need to make cuts, measure twice and mark your cutting line clearly with a pencil. For straight cuts, a power saw works best, but a sharp utility knife can work in a pinch. For more complicated cuts around door frames or vents, use a jigsaw with a fine-toothed blade. Pro tip: when cutting around door frames, lay a plank flat next to the frame and use it as a guide to mark where you’ll need to trim the molding.
Keep an eye on your expansion gaps as you go – they’re easy to forget when you’re in the zone, but they’re crucial for preventing buckling later. Use spacers consistently along all walls, and don’t forget them even in tight corners.
For the best-looking results, try to maintain at least 6 inches between end joints in adjacent rows. This creates that natural, random pattern that makes laminate flooring so appealing. If you end up with a short piece at the end of a row, don’t sweat it – just start the next row with a full plank to get back on track.
Remember to check your work every few rows by standing back and looking for any gaps or height differences between planks. It’s much easier to fix these issues as you go than to discover them after you’ve finished the entire room.
Finishing Touches
Now that your laminate flooring is in place, it’s time to add those finishing touches that will give your room a polished, professional look. Start by installing quarter-round molding or baseboards along the walls to cover the expansion gaps. Measure each wall section carefully and cut your molding at 45-degree angles for clean corner joints. Secure the molding with finishing nails, being sure to nail into the wall and not through the flooring to allow for natural expansion and contraction.
For doorways and transitioning between different flooring types, install appropriate transition strips to create smooth, safe connections. Style Selections offers matching transition pieces that complement your flooring perfectly. Simply cut them to size, apply construction adhesive to the track, and snap the strip into place.
Don’t forget to fill any nail holes in your trim with wood putty that matches the molding color. Once dry, give all your trim a quick wipe-down with a slightly damp cloth to remove any dust or fingerprints. Finally, arrange your furniture back in the room, making sure to use protective pads under all legs to prevent scratches.
Take a moment to inspect your work from different angles and in various lighting conditions. If you notice any minor gaps or imperfections, most can be easily addressed with color-matched filler designed specifically for laminate flooring. Your newly installed floor should now look stunning and ready to enjoy for years to come.
Maintenance Tips
Now that you’ve installed your beautiful Style Selections laminate flooring, proper maintenance is key to ensuring its longevity and keeping it looking fresh for years to come. Let’s dive into some essential care tips that’ll help you protect your investment.
Daily maintenance is straightforward – simply sweep or vacuum with a soft-bristle attachment to remove dust, dirt, and debris. For weekly cleaning, use a slightly damp (not wet) microfiber mop with a manufacturer-approved laminate floor cleaner. While there are many best steam mops for maintenance, avoid using them on your laminate flooring as excess moisture can damage the boards.
Prevention is your best friend when it comes to maintaining laminate floors. Place doormats at all entrances to catch dirt before it reaches your flooring, and consider adding felt pads under furniture legs to prevent scratches. If you have rolling chairs, invest in a plastic mat to protect the surface.
Quick spill response is crucial – immediately wipe up any liquid spills with a dry cloth to prevent moisture from seeping between the boards. For stubborn spots or sticky residue, use a slightly damp cloth with a specialized laminate cleaner, then dry the area thoroughly.
Here are some important don’ts to remember:
– Never use abrasive cleaners or steel wool
– Avoid wax-based products or polish
– Don’t use vinegar or ammonia-based cleaners
– Skip traditional wet mops or bucket cleaning
By following these maintenance guidelines, your Style Selections laminate flooring will maintain its beautiful appearance and durability. Remember to keep your cleaning routine simple and consistent, and always refer to the manufacturer’s specific care instructions for best results.
Congratulations! You’re now equipped with all the knowledge needed to install your Style Selections laminate flooring like a pro. Remember, success lies in thorough preparation – from acclimating your flooring materials to ensuring your subfloor is clean and level. Taking time to gather the right tools and materials before starting will make your installation journey much smoother.
Don’t let the process intimidate you. By following our step-by-step guide, you’ve learned how to measure accurately, lay the moisture barrier, and install your planks with precision. Those tricks for handling tricky spots like doorways and corners will save you time and frustration. And remember, paying special attention to expansion gaps and proper plank alignment will ensure your flooring looks beautiful and performs well for years to come.
Take pride in knowing you’ve tackled this project yourself! Not only have you saved money, but you’ve also gained valuable DIY skills. Your new laminate flooring will transform your space with its stylish appearance and durability. If you encounter any challenges along the way, don’t hesitate to review the steps or consult a professional for guidance.
Ready to show off your handiwork? Share your success with friends and family – you’ve earned those bragging rights! Your newly installed Style Selections laminate flooring will be a testament to your DIY dedication and attention to detail.