
Transform tired spaces into magazine-worthy rooms without hiring a single contractor. Start by refreshing kitchen cabinets with a weekend paint job and new hardware—a simple swap that delivers dramatic impact for under $200. Tackle high-visibility quick wins like installing peel-and-stick backsplash tiles, updating light fixtures, or creating a gallery wall with thrifted frames. These projects require minimal tools but maximize visual transformation.
Level up with statement-making furniture flips: sand down that curb find dresser, apply a bold color, and swap the pulls for instant custom storage. Build floating shelves using basic brackets and stained wood boards to add both function and style to blank walls. Outside, define your entryway with a DIY planter box made from cedar fence pickets, or string cafe lights across your patio using weather-resistant hardware.
The secret to DIY success lies in choosing projects that match your skill level while stretching your abilities just enough to build confidence. Whether you have two hours or two days, the right project transforms your house into a personalized home that reflects your style—no professional required.
Why DIY Home Improvement Is Your Best Investment Right Now
There’s something uniquely rewarding about stepping back and admiring a project you’ve completed with your own two hands. Beyond the obvious cost savings—which can reach 50% or more compared to hiring professionals—DIY home improvement offers benefits that money simply can’t buy.
First, there’s creative control. When you tackle projects yourself, you’re not limited by a contractor’s schedule or vision. Want to mix that specific shade of teal you’ve been dreaming about? Go for it. Prefer hardware with a vintage feel rather than modern minimalism? It’s entirely your call. This level of customization means your home truly reflects your personality and style.
Then there’s the skill development aspect. Every project teaches you something new, whether it’s mastering a miter saw, perfecting your paint technique, or understanding how plumbing actually works. These aren’t just one-time skills—they’re investments in your capability as a homeowner. The confidence you gain from successfully installing shelving carries over to your next, perhaps more ambitious project.
Yes, there’s a learning curve, and your first attempt might not look Pinterest-perfect. But that’s part of the journey. Start with choosing the right projects for your skill level, watch tutorials, and give yourself grace. The imperfections often become the charming details that make your space authentically yours—and the satisfaction of saying “I made that” never gets old.
Quick-Win Projects That Make a Huge Visual Impact
Accent Wall Magic: Paint, Wallpaper, and Beyond
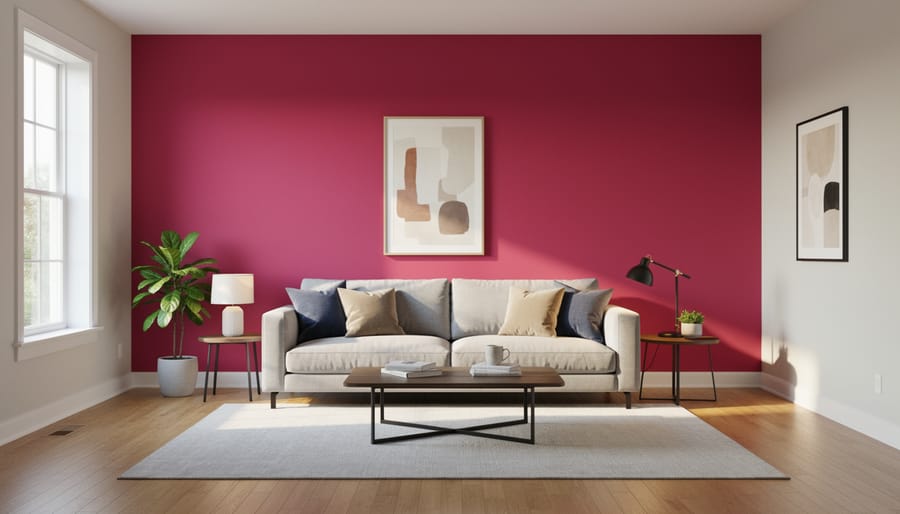
An accent wall can completely transform a room in just a weekend, and you have more options than ever to make it happen. Whether you’re drawn to bold paint colors, trendy peel-and-stick wallpaper, or the warmth of wood paneling, the key is choosing what speaks to your style and skill level.
Start by selecting your wall. Typically, the wall behind your bed, sofa, or fireplace makes the biggest impact. For paint, consider going two or three shades darker than your existing wall color for a cohesive look, or embrace contrast with jewel tones like emerald or navy. Before committing, test paint samples in different lighting throughout the day.
If you’re ready to explore advanced painting techniques, geometric patterns or ombre effects add serious wow factor. Use painter’s tape for crisp lines and always prime first for the best results.
Peel-and-stick wallpaper is your friend if you’re renting or commitment-phobic. Clean your wall thoroughly, start from the top corner, and use a smoothing tool to prevent bubbles. The beauty here is you can reposition as you go.
Wood paneling, whether reclaimed barn wood or modern slat designs, brings texture and dimension. Measure carefully and use a level to ensure straight installation.
Common mistakes to avoid: choosing colors without samples, skipping surface prep, and forgetting to account for furniture scale. Your accent wall should enhance the room, not overwhelm it. Remember, this is your creative canvas, so have fun with it.
Hardware Swaps That Refresh Your Entire Space
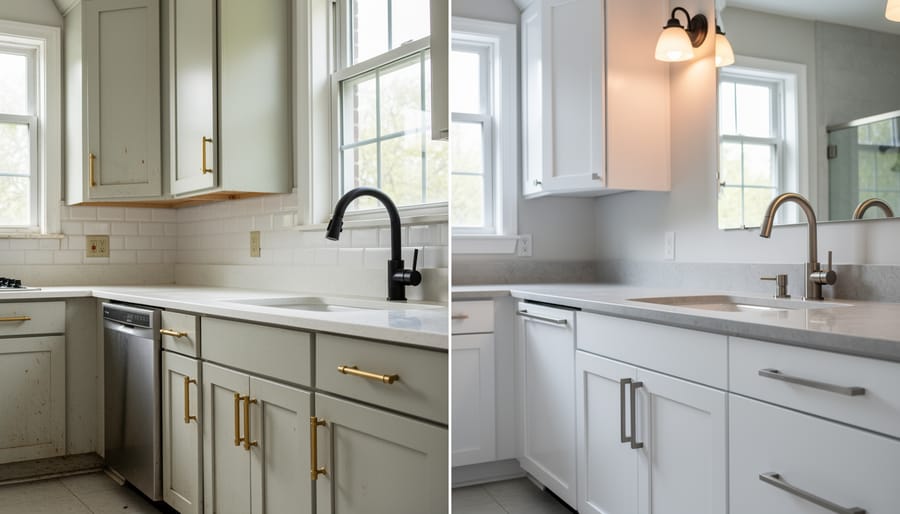
Sometimes the smallest changes deliver the biggest visual punch. Swapping out dated hardware is like giving your home a jewelry upgrade—it’s quick, affordable, and instantly noticeable.
Start with your kitchen and bathroom cabinets. Those brass handles from the ’90s? Replace them with sleek matte black pulls or brushed brass for a contemporary vibe. Measure your existing hole spacing before shopping to avoid extra drilling. Big-box stores offer fantastic budget options, but don’t overlook online retailers where you can snag designer-style hardware for a fraction of showroom prices.
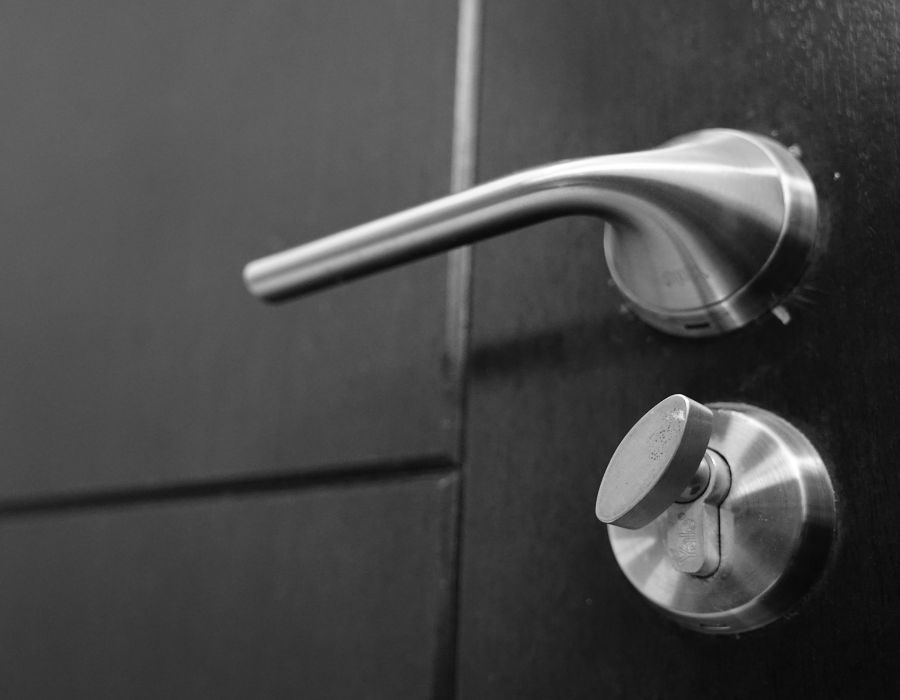
Door knobs deserve attention too. Upgrading from builder-grade brass to modern lever handles or vintage-inspired glass knobs transforms the feel of every room you enter. Keep finishes consistent throughout your home for a cohesive look—mixing metals works, but stick to intentional combinations like warm brass with matte black rather than random mismatches.
Light switch plates are the forgotten heroes of hardware swaps. Swap those yellowed plastic covers for clean white, brushed metal, or even decorative options that complement your room’s personality.
Finally, curtain rods make more impact than you’d think. Swapping flimsy poles for substantial rods with decorative finials elevates your windows from functional to fashionable. Look for secondhand options at thrift stores—many people donate perfectly good hardware during renovations.
Creative Lighting Upgrades Without Rewiring
You don’t need to call an electrician to transform your home’s ambiance with beautiful lighting. Plug-in pendant lights are game-changers for renters and homeowners alike. Simply install a ceiling hook, drape a stylish cord-wrapped pendant, and plug it into the nearest outlet. You’ve instantly created a focal point over your dining table or reading nook without touching a single wire.
Under-cabinet lighting breathes new life into kitchens. Battery-powered LED strips with adhesive backing take just minutes to install. Peel, stick, and suddenly your countertops have that magazine-worthy glow. Many options include remote controls or motion sensors, adding both convenience and a touch of modern sophistication.
Smart bulbs deserve special mention because they’re ridiculously easy to use. Screw them into existing fixtures, download an app, and you’ve got customizable colors, dimming capabilities, and voice control. Picture adjusting your living room from energizing daylight to cozy amber with a simple command. These simple swaps prove that dramatic lighting upgrades don’t require rewiring expertise or a hefty budget, just a willingness to try something new and brighten your space.
Weekend Warrior Projects for the Ambitious DIYer
Built-In Shelving That Looks Custom-Made
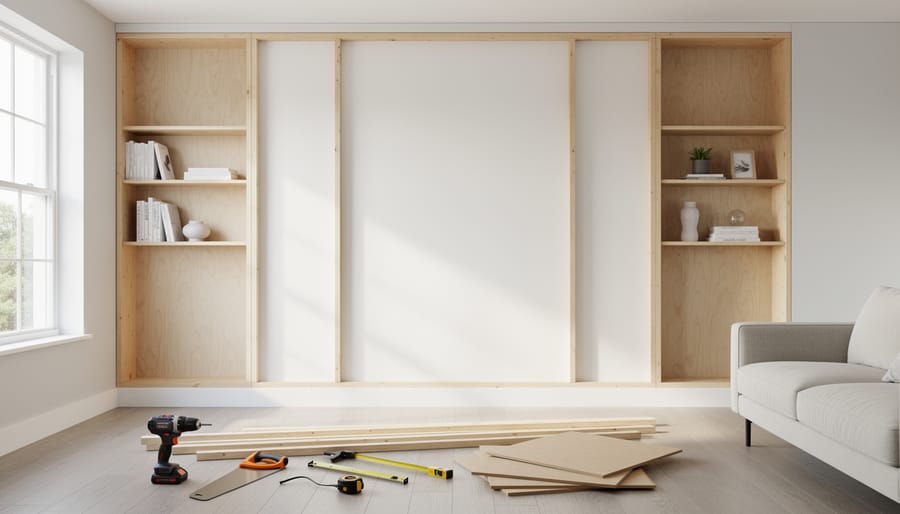
There’s something incredibly satisfying about built-in shelving that transforms a boring wall into a functional design statement. The best part? You can achieve that custom millwork look without the custom price tag or a carpenter’s skill set.
Start by measuring your space carefully and locating the wall studs with a stud finder. This step is non-negotiable since proper anchoring ensures your shelves won’t come crashing down with your book collection. For a floating shelf look, use concealed brackets or heavy-duty L-brackets that mount directly into studs. If you’re building floor-to-ceiling bookcases, consider using pre-made shelving units as your base and adding trim work around them to create that built-in appearance.
Materials like pine boards, MDF, or even budget-friendly melamine can be transformed with paint or stain to match your existing woodwork. The secret to making affordable materials look expensive lies in the finishing touches. Add crown molding at the top, baseboards at the bottom, and face frames around the edges. Suddenly, your IKEA hack looks like it cost thousands.
When it comes to configuration, think beyond straight rows of shelves. Mix shelf heights to accommodate everything from chunky coffee table books to small decorative objects. Include some closed storage with cabinet doors or baskets to hide clutter while maintaining visual interest.
Style your finished shelves using the rule of thirds, grouping items in odd numbers and varying heights. Layer books horizontally and vertically, intersperse decorative objects, and leave some breathing room. The result? A personalized library wall that looks professionally designed but carries your own creative fingerprint.
Bathroom Refresh: Vanity and Mirror Makeovers
Your bathroom vanity deserves some love, and you don’t need a full renovation to give it a fresh new look. Start by painting or refinishing your existing vanity with a durable cabinet paint in a trendy color like navy blue, sage green, or classic white. Sand lightly, apply a quality primer, and finish with two coats for a professional appearance that rivals store-bought pieces.
Swapping out dated faucets makes an immediate impact. Modern faucets are surprisingly easy to install with basic tools, and you’ll find options at every price point. Choose brushed gold, matte black, or polished nickel to match your style vision.
That builder-grade mirror getting you down? Frame it out with trim molding cut to size and painted to coordinate with your vanity. This simple trick adds architectural interest and makes your bathroom feel custom-designed. You can use decorative trim from your local hardware store and attach it with construction adhesive.
Finally, maximize storage with floating shelves, over-the-toilet cabinets, or stylish baskets. These additions keep countertops clutter-free while adding personality. Consider adding hooks on the back of the door or installing a narrow rolling cart between the vanity and wall. These achievable updates transform your bathroom into a spa-like retreat without the renovation headache.
Outdoor Living Spaces on a DIY Budget
Transform your backyard into an inviting retreat without breaking the bank. Start with simple deck furniture that packs personality—wooden pallets make surprisingly stylish seating when sanded, stained, and topped with outdoor cushions. You can build a complete outdoor sofa for under $100 in materials.
Privacy screens add instant ambiance while defining your space. Try constructing a lattice panel fence using cedar strips, or plant climbing vines along a DIY trellis. Bamboo screening attached to simple wooden frames creates an affordable tropical vibe that blocks unwanted sightlines.
Outdoor lighting dramatically extends your enjoyment into evening hours. String lights hung on posts or between trees establish magical atmosphere for minimal investment. Solar pathway lights guide guests safely while mason jar lanterns with LED candles add charming focal points. Consider outdoor ceiling upgrades for covered patio areas to enhance both lighting and visual appeal.
A DIY fire pit becomes your backyard’s gathering heart. The easiest approach uses retaining wall blocks arranged in a circle—no mortar required. Dig a shallow base, add gravel for drainage, stack your blocks, and you’ve created a cozy centerpiece for s’mores and conversation. Always check local fire regulations before building, and position your pit safely away from structures and overhanging branches.
Furniture Transformations That Save You Thousands
The Art of Furniture Refinishing
Transforming tired furniture into statement pieces is one of the most rewarding DIY projects you can tackle. The process might seem intimidating at first, but with the right approach and products, you’ll achieve results that rival professional work.
Start by stripping old finish with a quality chemical stripper like Citristrip, which works effectively without harsh fumes. Apply generously, let it sit for the recommended time, then scrape away the loosened finish. Always work in a well-ventilated area and wear protective gloves.
Next comes sanding, your secret weapon for smooth results. Begin with 80-grit sandpaper to remove any remaining finish and imperfections, then progress through 120-grit and finish with 220-grit for a silky surface. An orbital sander saves time on larger pieces, but hand-sand detailed areas and edges for better control.
For staining, Minwax offers excellent color variety and consistent results. Apply with a foam brush or clean cloth, working with the wood grain. Wipe away excess after a few minutes for lighter tones, or leave longer for deeper color saturation.
If painting is your preference, choose chalk paint for a trendy matte finish or semi-gloss for durability in high-use areas. Finish either route with polyurethane sealer to protect your beautiful handiwork for years to come.
Reupholstery Basics for Chairs and Benches
Breathing new life into tired furniture is easier than you think, and reupholstery projects are perfect starting points for DIY enthusiasts. You don’t need a professional upholsterer’s skills to transform dining chairs, ottomans, or bench cushions into statement pieces that reflect your style.
Start with a simple dining chair seat. Remove the existing fabric by flipping the chair over and using a screwdriver to take out staples or tacks. This reveals the cushion beneath, which you might keep if it’s still firm or consider replacing cushion foam for extra comfort. Measure your seat, adding four inches on all sides for wrapping and securing.
Fabric selection makes all the difference. Choose durable upholstery-weight fabrics for high-traffic pieces like dining chairs. Cotton canvas, linen blends, or performance fabrics withstand daily use beautifully. For benches and ottomans with less wear, you can explore bolder patterns or lighter materials.
The actual reupholstery process is wonderfully straightforward. Center your fabric face-down, place the cushion on top, then pull fabric taut and staple from center to corners, alternating sides for even tension. Trim excess fabric, reattach the seat, and admire your handiwork. One weekend afternoon can completely transform multiple chairs, giving your dining room a cohesive, custom look without the custom price tag.
Essential Tools and Materials to Keep on Hand
Building your DIY toolkit doesn’t mean emptying your wallet on day one. Think of it as creating your creative arsenal gradually, starting with the essentials that’ll handle about 80% of your home projects.
The absolute basics should include a quality hammer, screwdriver set (both flathead and Phillips), tape measure, level, adjustable wrench, and utility knife. Add a cordless drill to this list as your first power tool investment—it’s genuinely transformative for everything from hanging shelves to assembling furniture. You’ll also want painter’s tape, a putty knife, and safety glasses. These foundational tools will run you around $100-150 if you shop smart.
Once you’ve tackled a few projects, consider expanding to nice-to-haves like a power sander, miter saw, stud finder, or brad nailer. These elevate your capabilities but aren’t deal-breakers when you’re starting out.
Budget-savvy strategies make all the difference. Buy quality hand tools that’ll last decades, but consider mid-range options for power tools you’ll use occasionally. Estate sales and online marketplaces often hide excellent deals on gently-used equipment. Many home improvement stores also offer tool rental programs for those pricier items you’ll only need once or twice.
Don’t overlook maintenance—clean your tools after each project, oil moving parts occasionally, and store everything in a dry space. A well-maintained $30 hammer outperforms a neglected $60 one every time. Your future self will thank you when everything’s ready to go for that spontaneous weekend project inspiration.
Avoiding Common DIY Pitfalls Before They Happen
Even the most enthusiastic DIYers can stumble into preventable problems. The key is planning before you pick up that paintbrush. Start by measuring twice and cutting once—seriously, this old saying exists because measurement mistakes are incredibly common and frustrating. When buying materials, add 10-15% extra to account for errors or pattern matching.
Know your limits and be honest about when a project needs professional hands. Electrical work, structural changes, and plumbing repairs often require permits and expertise. It’s not admitting defeat—it’s being smart about safety and long-term home value.
Set realistic timelines, especially for first-time projects. That weekend bathroom refresh might actually need two weekends, and that’s perfectly fine. Rushing leads to sloppy results you’ll regret later.
Watch out for scope creep—that innocent cabinet painting project that suddenly becomes a full kitchen renovation. Stay focused on your original plan and budget. Learning from common DIY mistakes helps you avoid costly do-overs and keeps your projects enjoyable rather than stressful.
You’ve just explored a world of possibilities, and now it’s your turn to transform those ideas into reality. The beauty of DIY home improvement is that you don’t need to tackle everything at once. Start with one simple project that excites you, whether it’s refreshing a tired piece of furniture with paint or creating a cozy outdoor nook. Each completed project builds your skills and confidence, proving that you’re more capable than you might think. Don’t be intimidated by the journey ahead—every home improvement expert started exactly where you are now, with curiosity and a willingness to try. Browse around for more inspiration, gather your supplies, and take that first step. Remember, the most rewarding spaces are created one project at a time, and every beginner has the potential to become a master of their own home.