Map your available square footage before buying a single dumbbell, measuring ceiling height, doorway clearances, and floor-to-wall dimensions to avoid the costly mistake of purchasing equipment that won’t fit or function safely in your space. Divide your workout area into distinct zones—cardio equipment near windows for natural motivation, strength training against sturdy walls for anchored accessories, and stretching areas in open corners—creating an organized fitness space that flows naturally through your routine rather than fighting against cramped quarters.
Position your heaviest equipment first, placing treadmills and squat racks on reinforced flooring or ground-level spaces while keeping frequently-used items like resistance bands and yoga mats within arm’s reach of your primary workout zone. Install mirrors strategically on one full wall to check your form during exercises while visually doubling your room’s perceived size, transforming even a spare bedroom or garage corner into a legitimate training environment. Build vertical storage solutions using wall-mounted racks and pegboards to reclaim valuable floor space, ensuring every kettlebell, medicine ball, and jump rope has a designated home that keeps pathways clear and motivation high.
Assessing Your Space: The Foundation of Smart Gym Layout
Measuring Beyond Square Footage
When you’re planning your home gym, the magic happens in the details beyond just floor space. Think of ceiling height as your secret weapon—you’ll need at least 8 to 9 feet to comfortably swing a kettlebell overhead or perform jumping exercises without feeling claustrophobic. I learned this the hard way when a friend tried to do burpees in their 7-foot basement ceiling and ended up with bruised knuckles!
Doorway width matters more than you’d expect, especially if you’re bringing in larger equipment like a squat rack or treadmill. Standard 32-inch doors work for most items, but double-check measurements before purchasing bulky gear. Nobody wants to discover their dream elliptical won’t fit through the entrance.
Electrical outlets are the unsung heroes of functional gym design. Position them strategically for treadmills, fans, and device charging stations without creating a spider web of extension cords across your workout zone. Adequate ventilation keeps the space fresh and comfortable during intense sessions—consider adding a fan or ensuring windows can open easily.
Natural light transforms any workout space from dungeon to energizing retreat. Even if you’re working with a windowless area, proper lighting choices can simulate that motivation-boosting brightness that makes you actually want to exercise.
Choosing the Right Room for Your Fitness Goals
Finding the perfect spot for your workout zone is like choosing the foundation for any great home project—it sets the stage for everything else! When building a home gym, location matters as much as the equipment you’ll use.
Spare bedrooms offer climate control and easy access, making them ideal for yoga, pilates, or light cardbell work. The downside? Limited square footage and potential noise concerns for nearby rooms. Basements provide generous space and natural sound insulation, perfect for heavy lifting or high-intensity workouts. However, watch for moisture issues and lower ceilings that might restrict overhead movements.
Garages shine for heavy equipment enthusiasts who need durability over aesthetics. You’ll have plenty of room and won’t worry about dropped weights damaging floors. The trade-off includes temperature extremes and dust exposure. Multi-purpose spaces like living rooms work wonderfully for minimalist setups with foldable equipment, keeping your investment flexible. The challenge lies in constant setup and takedown.
Consider your workout style, available square footage, and household traffic patterns. A powerlifter needs different accommodations than a yoga practitioner, so let your fitness goals guide your room selection.
The Three-Zone Approach to Home Gym Organization

Zone 1: The Cardio Corner
Your cardio zone deserves thoughtful planning since these machines become the workhorses of most home gyms. Start by positioning treadmills and bikes away from walls—leave at least 2-3 feet of clearance behind treadmills for safe dismounting and proper airflow. If you’re arranging multiple machines, space them 3-4 feet apart so you’re not feeling cramped during those intense sessions.
Entertainment makes cardio time fly by, so consider positioning machines to face a TV or window with an inspiring view. Mount screens at eye level when you’re in motion, typically 4-5 feet high for treadmills. Many homeowners discover that placing their cardio corner near a window transforms monotonous workouts into more enjoyable experiences.
Ventilation is your best friend here. Cardio equipment generates serious heat and moisture, so position this zone near windows, ceiling fans, or portable fans. If your space lacks natural airflow, invest in a quality floor fan—your future sweaty self will thank you. Rubber mats beneath each machine protect flooring and reduce noise, especially important if you’re setting up shop above living areas. Keep water bottle holders or a small shelf nearby because hydration breaks shouldn’t require a trek across your workout space.
Zone 2: The Strength Training Hub
This is where the magic happens for building serious strength! Your strength training zone deserves thoughtful planning to keep you safe and motivated.
Start with your power rack or squat stand as the anchor piece. Position it against a wall with at least 6 feet of clearance in front for safe barbell movements. You’ll want 2-3 feet on each side too, giving you room to load plates without bumping into other equipment. A full-length mirror directly facing this area helps you check your form during squats and presses.
Next, create a dedicated free weight area. Designate space for dumbbells, adjustable kettlebells, and weight plates. A simple three-tier dumbbell rack keeps everything organized and prevents that dreaded equipment sprawl. Allow a 4-foot diameter circle around this zone so you can safely perform exercises like dumbbell rows or goblet squats without feeling cramped.
Position your adjustable bench within easy reach of both the rack and free weights. This creates an efficient workout flow where you can transition seamlessly between exercises. Remember, benches need about 6 feet of total space when accounting for movement during exercises.
Pro tip: Add rubber flooring specifically in this zone. It protects your floor from dropped weights and provides cushioning that reduces noise. Your downstairs neighbors will thank you!
Zone 3: Your Flexibility and Cool-Down Space
Every muscle needs love after a good workout, and that’s exactly what Zone 3 delivers. Your flexibility and cool-down space doesn’t require fancy equipment, just thoughtful planning. Dedicate a corner with enough room to fully extend your arms and legs in all directions. Think at least 6×6 feet if space allows.
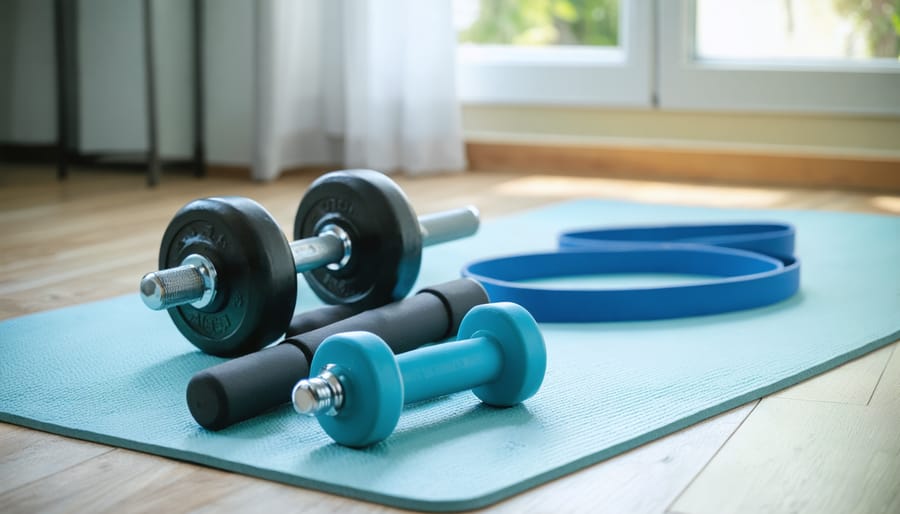
A quality exercise mat or yoga mat is your foundation here. Consider foam tiles for extra cushioning and easy cleaning. Add a small storage basket nearby for resistance bands, foam rollers, and yoga blocks. A wall-mounted mirror helps with form checks during stretches.
Keep this zone clutter-free and calming. Soft lighting or a small plant creates a recovery-focused atmosphere that encourages you to actually use the space. Position it away from high-energy equipment zones to maintain that peaceful vibe. Some people love placing this area near a window for natural light and fresh air. The goal is creating a spot where your body genuinely wants to wind down and recover.
Smart Storage Solutions That Keep Equipment Accessible
Wall-Mounted Systems for Vertical Storage
When floor space is at a premium, look up! Your walls are prime real estate just waiting to help you conquer gym clutter. Wall-mounted storage systems transform chaos into organized bliss while keeping your workout area clear and inviting.
Pegboards are the ultimate customizable solution. Install one above your workout zone and use hooks to hang resistance bands, jump ropes, or even lighter dumbbells. You can rearrange the configuration as your fitness collection grows, making it a flexible choice that adapts to your needs.
Wall racks designed specifically for weights keep heavy equipment accessible yet safely stored. Horizontal bar racks work beautifully for storing barbells or resistance bands, while vertical plate racks can hold weight plates in a compact footprint. Mount these at convenient heights so grabbing what you need doesn’t interrupt your flow.
Floating shelves add both function and style. Use them to display yoga mats rolled and standing upright, organize foam rollers, or store smaller accessories like workout gloves and water bottles. Choose sturdy brackets rated for the weight you’ll be storing—nobody wants a shelf crash mid-workout!
The beauty of vertical storage is it creates clean sightlines and makes your space feel larger while keeping everything within arm’s reach.

Multi-Functional Furniture and Hidden Storage
When floor space is precious, think beyond traditional storage solutions to keep your gym organized and functional. Storage benches are double-duty champions, offering a comfortable spot to lace up your sneakers while hiding resistance bands, yoga blocks, and smaller accessories inside. Position one near your entrance or along a wall to maximize every square foot.
Equipment carts on wheels transform your space instantly. Load them with dumbbells, kettlebells, or foam rollers, then roll everything into a closet or corner when you’re done. This approach works beautifully if your gym shares space with a guest room or home office, letting you reclaim the area in seconds.
Don’t overlook the real estate under benches and equipment racks. Sliding storage bins fit perfectly beneath most workout benches, keeping towels, cleaning supplies, and extra weights within arm’s reach but out of sight. Clear bins let you spot what you need at a glance, while labeled containers keep everything categorized.
Consider mounting fold-down wall shelves for water bottles and electronics. They stay flat when not in use, maintaining that clean, uncluttered aesthetic that makes working out feel more inviting.
Traffic Flow and Safety Clearances You Can’t Ignore
Minimum Clearances Around Major Equipment
Getting the clearances right around your equipment prevents those awkward mid-workout collisions and keeps your home gym feeling spacious rather than cramped. Think of these measurements as your safety buffer zones that make all the difference between a functional space and a frustrating one.
For treadmills and ellipticals, plan for at least 3 feet behind the machine and 2 feet on each side. This gives you a safe dismount area and prevents that heart-stopping moment when you step off backward without enough room. If you’re placing equipment near walls, that rear clearance becomes especially crucial.
Weight benches need approximately 6 to 7 feet of clearance on all sides where you’ll be lifting. This accounts for barbell length plus the swing space when you’re bringing the bar down to your chest or pressing overhead. For barbells specifically, calculate the bar length (typically 7 feet) plus an additional 2 feet on each end for plate loading and movement.
Cable machines and multi-station units require about 5 feet in front for full range of motion during exercises like lat pulldowns or cable flies. You’ll want to extend your arms completely without punching the wall behind you.
Rowing machines are deceptively space-hungry, needing 8 to 9 feet of linear space to accommodate the full slide motion. Don’t forget to measure your actual reach when fully extended on the machine rather than just the equipment dimensions.
Creating Natural Workout Paths
Think of your workout flow like a story with a beginning, middle, and end. Start by placing your cardio equipment near the entrance as your warm-up zone. This creates a natural transition into your space and gets blood flowing before you tackle heavier lifting. Next, position your strength training equipment in the center area where you’ll spend most of your time. Group similar items together—dumbbells near the bench press, resistance bands within reach of your mat area.
The key is minimizing awkward zigzagging between stations. If you typically do squats then move to upper body work, arrange those zones side-by-side rather than across the room. Leave clear walking paths at least three feet wide so you’re not climbing over equipment mid-workout. Consider your actual routine when planning—if you love circuit training, create a circular flow pattern. For traditional sets and rests, a linear arrangement works beautifully. Small adjustments like angling your bench toward open space or keeping frequently-used items at arm’s reach can transform a frustrating shuffle into a seamless workout experience that keeps you motivated.
Layout Strategies for Different Space Sizes
The Compact Gym (Under 100 Square Feet)
Working with under 100 square feet doesn’t mean compromising your fitness goals—it just means getting creative with every inch. The secret to a successful compact gym lies in choosing equipment that works double duty and disappears when you’re done.
Start by claiming your vertical space. Wall-mounted pull-up bars, resistance band anchor points, and fold-down weight racks keep the floor clear while giving you serious workout options. Consider a Murphy-style wall bench that flips up and locks away, transforming from your workout station to barely-there wall panel in seconds.
Foldable equipment is your best friend here. A quality folding weight bench, collapsible resistance bands with door attachments, and adjustable dumbbells that replace an entire rack save precious square footage. Store lighter items like yoga mats, foam rollers, and resistance bands in slim vertical storage towers that fit beside doorways.
Think strategically about multi-use gear. Stability balls double as desk chairs, kettlebells work for dozens of exercises, and a simple jump rope delivers serious cardio without hogging space. With thoughtful selections, your compact gym can rival larger setups in functionality while maintaining the flexibility to reclaim your space for other activities.

The Standard Home Gym (100-200 Square Feet)
With 100-200 square feet to work with, you’ve got room to create a truly functional workout space using the three-zone approach we discussed earlier. Think of this as your sweet spot—enough space for variety without overwhelming your home.
Start by dedicating your largest area to the cardio zone. Position your treadmill or stationary bike against a wall where you can mount a TV or mirror for motivation. Next to it, create your strength training zone with a power rack or wall-mounted folding rack, adjustable bench, and dumbbell set. A simple weight tree keeps those dumbbells organized and accessible.
Your flexibility zone can be surprisingly compact—just 6×6 feet works beautifully. Roll out a yoga mat, add some resistance bands on wall hooks, and you’re set for stretching and mobility work.
Here’s a pro tip from my own setup: use the perimeter for equipment storage and keep the center open for dynamic movements like jumping jacks or burpees. Install floating shelves for smaller accessories, and consider a corner for foam rollers and yoga blocks. This layout gives you professional gym functionality while maintaining enough breathing room to actually enjoy your workouts.
The Spacious Fitness Studio (200+ Square Feet)
Lucky you! With over 200 square feet, you’re working with serious potential to create a dream home gym that rivals boutique fitness studios. This size opens up endless possibilities for dedicated training zones tailored to your favorite workouts.
Consider dividing your space into distinct areas: a cardio corner with your treadmill or bike, a strength training section featuring free weights and a power rack, and a functional fitness zone with room for bodyweight exercises, yoga, and stretching. You can even incorporate specialized equipment like rowing machines or cable systems without feeling cramped.
The beauty of this square footage is accommodating workout partners or family fitness sessions. Picture a designated mat area large enough for two people doing yoga simultaneously, or enough clearance around your bench press for a spotter to move safely. You might add mirrors along one wall to check form, install wall-mounted storage for accessories, and still have breathing room.
Think about adding premium touches: rubber flooring throughout for noise reduction, a small speaker system, or a mounted TV for streaming workout classes. This is your chance to design something truly special that motivates you daily.
Making Your Gym a Place You Actually Want to Use
You’ve mapped out the perfect equipment placement, but here’s the secret: a gym’s atmosphere can make or break your motivation. Let’s transform your workout space from a basic setup into somewhere you’ll genuinely look forward to spending time.
Start with mirrors—they’re not just for admiring your form. Strategically placed mirrors create the illusion of more space while helping you maintain proper technique during exercises. Position them across from your primary workout zone, and suddenly your basement feels twice as large. Even a single 4-foot mirror can dramatically change how the room feels.
Lighting deserves serious consideration when upgrading your home gym. Harsh overhead fluorescents? That’s a motivation killer. Layer your lighting instead: combine bright ceiling fixtures for safety with softer accent lights or LED strips to create energy. Natural light wins every time if you have windows—it boosts mood and makes morning workouts feel less daunting. For windowless spaces, choose daylight-spectrum bulbs that mimic natural sunshine.
Your flooring does more than protect your floor—it defines zones and adds visual interest. Mix rubber mats for your lifting area with foam tiles for stretching zones. This practical choice also helps your brain recognize different workout areas, making transitions smoother.
Color psychology matters more than you’d think. Bold accent walls in energizing shades like deep blue or vibrant orange can pump up intensity, while calmer tones work well for yoga corners. One homeowner I know painted their cardio wall a energetic coral—they swear it adds ten minutes to every session.
Don’t forget the personal touches. Motivational quotes, a quality speaker system, or a small plant collection might seem minor, but they signal that this space matters. Your gym should reflect your personality, not resemble a sterile commercial facility. These finishing touches transform obligation into excitement.
Creating your dream home gym doesn’t have to happen overnight, and honestly, that’s part of the beauty of it. If you’re feeling overwhelmed by all the possibilities, remember that tackling one zone at a time is perfectly fine. Start with your cardio corner this month, add your strength training area next, and gradually build out from there. This approach not only spreads out the investment but also lets you genuinely test what works for your routine before committing to a full layout.
The most important thing to remember is that the perfect gym layout isn’t the one that looks like a magazine spread or fits every piece of equipment under the sun. It’s the one that matches how you actually exercise, fits comfortably in your available space, and makes you excited to work out. Whether that’s a minimal setup in a spare bedroom or a fully equipped garage gym, what matters is that it serves your goals and lifestyle. When your space feels right, you’ll find yourself showing up consistently, and that’s when the real transformation happens.